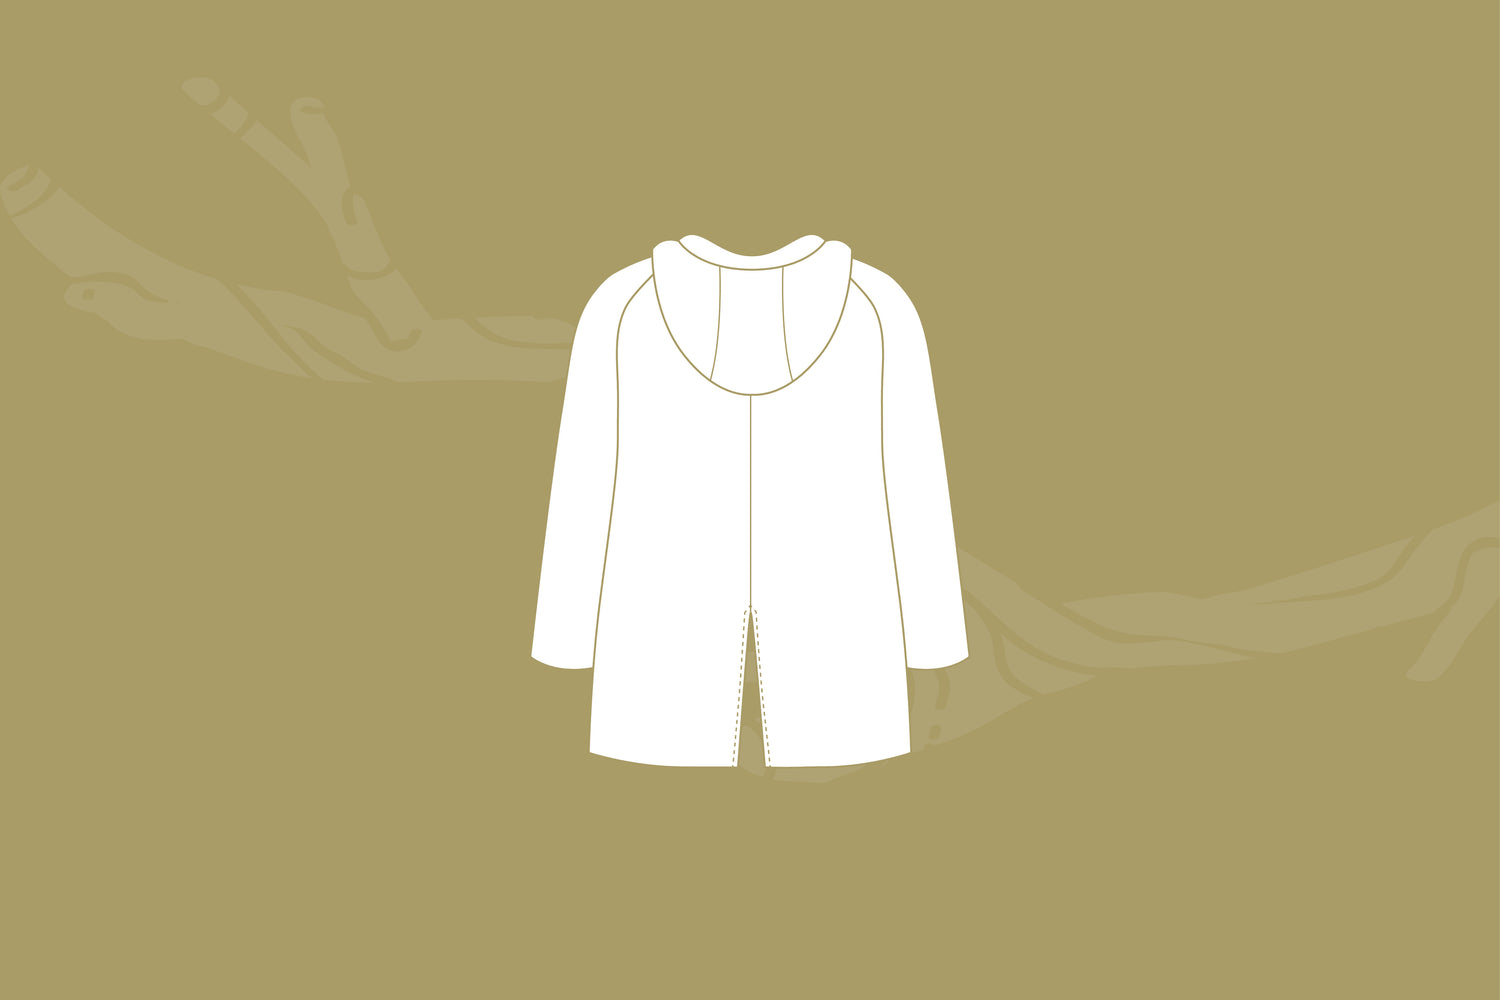
A quick way to add versatility and comfort to a longer style coat which will be worn a lot in both standing and seated positions is to add a back split.
Incorporating this feature allows the coat to sit more smoothly on the sides and front, and not get caught under the buttocks as the wearer is sitting down. Especially useful for wheelchair users, this also means the coat fits more akin to a riding coat, making it suitable for horseback riders.
This pattern modification works well with the Grove Coat and the Pixie Coat.
 Materials:
- Pixie Coat or Grove Coat pattern pieces
- Measuring tape
- Scrap paper (for adding seam allowance if directed)
- Tape
- Ruler
- Pencil
Creating the Split Back
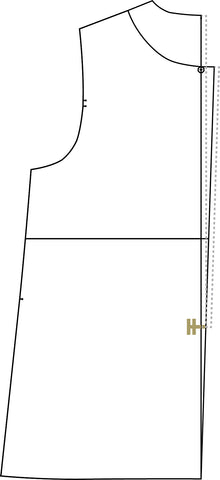
1. Locate where you need the top of the split to begin. A good place for this is 2-4" (5-10cm) above the top of the seat surface. Measure from your high shoulder point (the position on your shoulder close to your neck) to your desired split height position.
Mark this measurement on to the Back pieces of your pattern, straight down from the high shoulder point:

2. Aligning with your previous mark, draw a notch to indicate the top of the split onto the centre back edge of your back and back lining pattern pieces.
If making the Pixie Coat you will need to add a centre back seam. Mark in a 3/8" (1cm) seam allowance at this point along the outside of the fold line on the Back, Back Lining and Back Hem Facing.
3. When sewing the body pieces together: sew the centre back seam closed to the top of the split, leaving the seam open below your marked notch. Do this on both the exterior and lining pieces. Press
4. For PIXIE Coat Only: Sew the hem facings onto the lining as per the tutorial.
5. For PIXIE Coat Only: When sewing the lining and facings to the body (step 65 in the tutorial file) pivot at the bottom of the split and sew the exterior and lining together up to the split top.
When you reach the the top of the split, pause and pin the centre back seam allowances in this area away from the side you're currently sewing, exposing the centre back seam stitches. Stop at the centre back stitching, backtack to secure the stitches, and snip the thread.
Unpin the centre seam allowances, and pin them both to the side of the coat you've just completed sewing. Starting a new seam from the newly exposed side of the centre back stitches, sew down the other side of the split.
Finish sewing the lining to the body as written in the pattern tutorial.
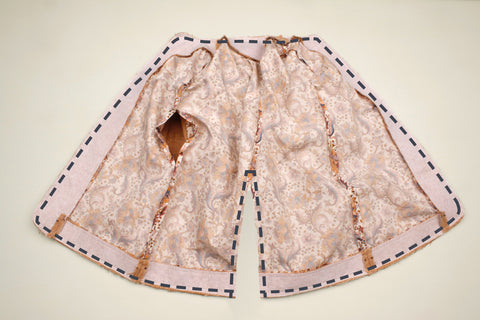
6. For GROVE Coat Only: Sew the lining and facings to the body as directed in the tutorial, until you reach the the split ends (step 63 in the tutorial file). Leaving the split open for now.
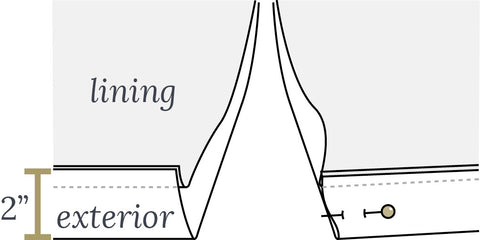
7. For GROVE Coat Only: At each bottom edge of the split, fold the memory pressed hem allowance the 2" (5cm) as in the tutorial. Pin in place.
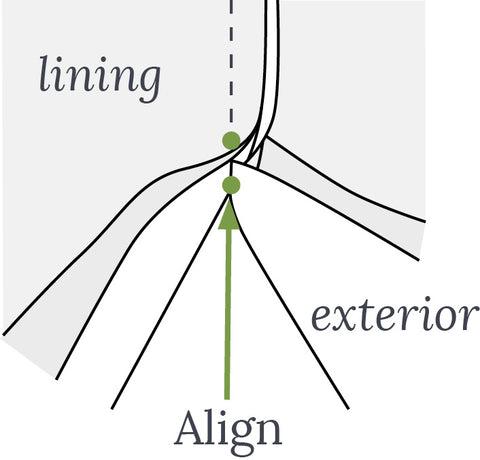
At the top of the split, pin the ends of the centre back seam stitching together so they match up.
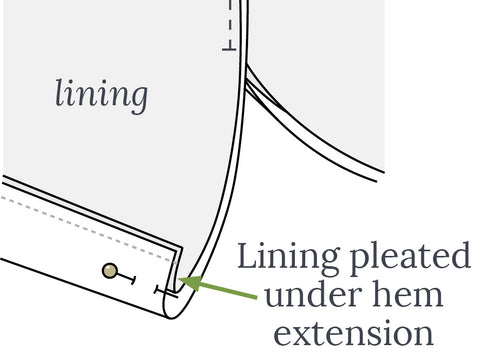
This will likely create extra length in the lining along the split, this is OK!

Smooth the lining from the top of the split, down to the top edge of the hem allowance, until it forms a pleat inside the hem.
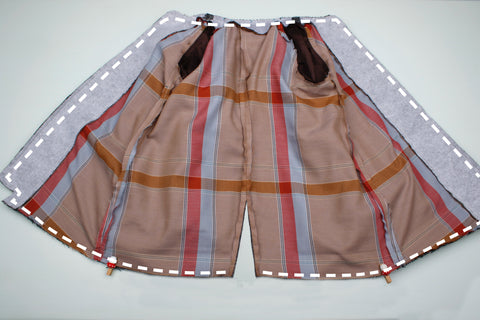
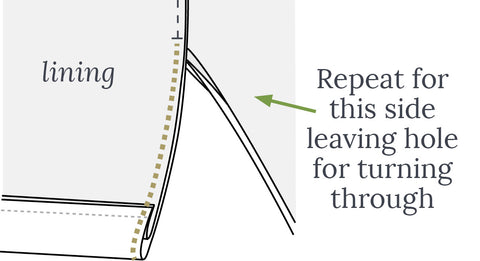
Sew each side of the splits to join the lining to the exterior. LEAVE A TURNING GAP on one side of the split!!
8. Turn your coat through, press the split and topstitch each side to hold the lining inside. A wider topstitch with a triangle point at the top can be a lovely detail 🙂

![]()
Read more Twig + Tale sewing tutorials here:
- How to Add a Cut Out Back to a Coat for Fulltime Wheelchair Users
- How to Add a Knit Cuff
- Interlining a Garment for Warmth


