I found a great zip and I want to show it off!
I want to be able to seal myself into my coat but also open it a little from the bottom!
I want to be able to add the Nestledown feature to my Grove/Pixie!
Do any of these thoughts resonate? Or perhaps you find buttons or snaps not to your taste and you would like to use an alternative. If you've found yourself in this position, then here's how to hack your Grove or Pixie Coat to have a visible front zip!
![]()
Materials:
- Pixie Coat or Grove Coat pattern pieces
- Suitable sized zipper (see Selecting a Zipper)
- Measuring tape
- Ruler
- Pencil
Preparing your pattern:
Locate the button markings on the centre front of the Grove or Pixie Coat. Mark a line through the button markings and trim off the front edge of the pattern. Don't discard the sliced off pattern piece just yet.
This new trimmed edge will become the new centre front of the coat. There is no need to add a seam allowance to this edge as the zip teeth width will compensate for the lost fabric at the front.
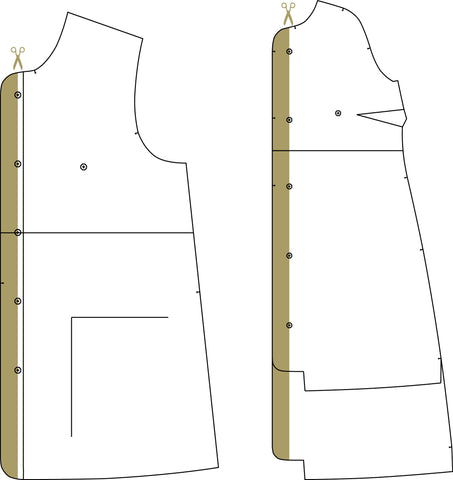
You will then need to duplicate this trimmed edge on the Front Facing. As there are no button markings on the front facing, instead use the scrap you trimmed off the front to mark in the facing.
Note: If you would like to use the pregnancy panel (Nestledown Add-on), you will also need to trim off some of the length from the top of the panel (narrow end). This is so that the Add-on matches the length of the front trimmed edge.
Selecting a Zipper:
Measure the front length of your modified coat pattern, and ensuring to remove 6/8" (2cm) for seam allowance, choose an appropriate length open-end/separating zipper. Zips are generally available in 2" (5cm) increments so they may not go all the way to the hem edge of the coat.
Installing the Zipper:
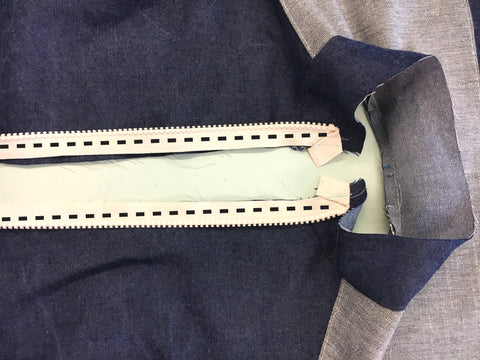
1. With the zipper right side down, fold over the top edges of the zipper tape and stitch them in place as shown by the black lines on the photo.
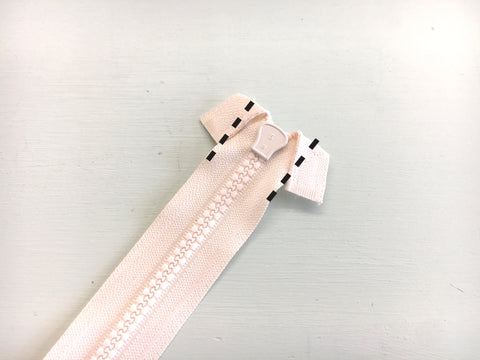
To prevent certain fabrics from stretching when sewing the zipper on, you may wish to iron a strip of stabiliser/lightweight interfacing onto the wrong side of the front edges (lining and/or exterior fabric) before attaching the zipper.
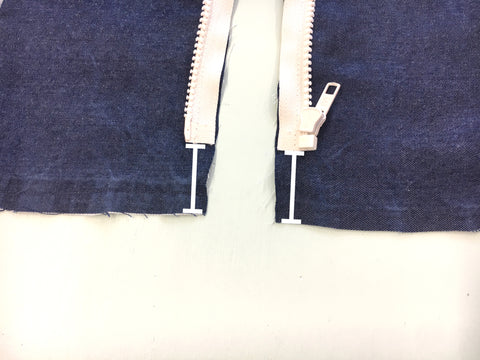
2. Separate the zipper. Place each side of the zipper face down, aligning the edges of the zipper tape with the raw edges of the coat front.
Our zipper has the zipper-pull attaching to the left side of the garment as it worn. If your zipper pull is on the other side it isn’t a problem and the directions are the same. The photos will simply show the pull on the opposite side.
Please note, this and the following instructions feature front pieces from the Forester Coat, but the method is the same.
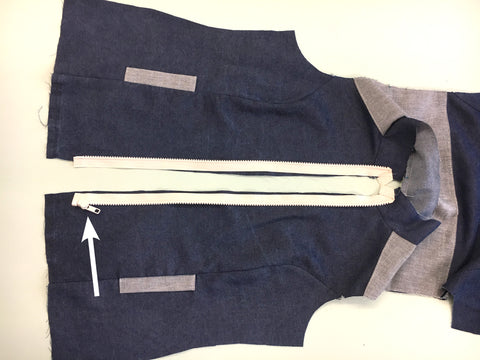
3. Ensure the top teeth of each side of the zipper are 5⁄8” (1.5cm) from the the raw neck edge of the Grove or Pixie Fronts.
Note: the top edge of the Forester Coat is pictured below, for the Grove or Pixie, you will instead be looking at the raw neck edge.
4. Change to a zipper foot on your sewing machine. Ensure that the zipper tape is aligned with the raw front edge of the coat. Machine baste the sections where the collar attaches to the fronts, with 3⁄8” (1cm) seam allowance - seen below as indicated by the dotted lines.
This is a professional method to ensure the seams line up perfectly every time. If you miss this step, there is the potential for the fronts to stretch slightly when they are being stitched, resulting in misaligned seams at the most visible part of the garment.
To prevent that - please baste! See the following step for a photo of sewing the zipper.

5. A closer look at basting the zipper.

6. Fasten the zipper and check that the neckline edges align perfectly.
If they don’t, unpick the basting, reposition and baste again.
It is totally worth taking a moment or two to get this right. You will be super proud of your garment when everything aligns beautifully!
Note: as above, the top edge of the Forester Coat is pictured below, for the Grove or Pixie, you will instead be looking at the raw neck edge.

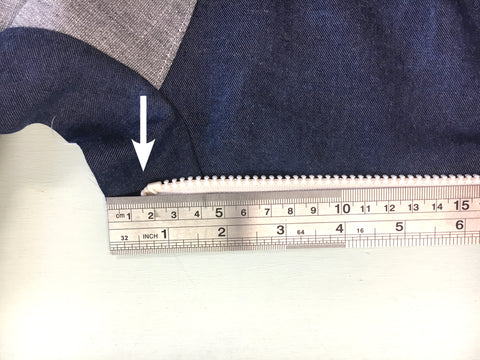
7. Once you are happy with the positioning at the collar, lay out and pin the remainder of the zipper tape along the edges of the coat fronts.
The bottom points of the zipper should be an equal distance from the bottom of the coat. There is no specific distance that the zipper should be from the bottom so long as it is a minimum distance of 5⁄8” (1.5cm).
8. Stitch the zipper on using a 3⁄8” (1cm) seam allowance and a zipper foot.
Slide the zipper pull part way down the zipper before starting. Sew up to the zipper pull, and then with your needle down, lift up the presser foot and slide the zipper pull behind the foot up to the top where it will be out of the way.
Put your presser foot back down again and continue sewing.
9. Fasten your zip, take an admiring look, and give yourself a little pat on the back - you did it!
Now go ahead and unfasten the zipper, ready for the next step.

10. Finish as per the Grove/Pixie tutorials to join facing and linings to exterior. Topstitch either side of the zip to hold the fabric and lining away from the zip teeth.
Enjoy your new zip-up coat!
![]()
Read more Twig + Tale sewing tutorials here:
- How to Add a Concealed Zipper to your Twig + Tale Coat or Vest
- Adding a Zipper to Outerwear - Children's Pixie Pea
- How to Add a Knit Cuff
- Interlining a Garment for Warmth
- Convert the Nestledown Vest for Back Wearing


