One of the great pleasures of sewing clothing is the ability to adjust patterns for a customized fit. Here, we demonstrate a simple method for adjusting the Forester Coat for those with broad shoulders. This tutorial will also work for modifying the shoulder width of the Women's/Curved Fit Pathfinder and Adult Trailblazer Vests. It's such a quick pattern modification to achieve a beautiful fit!
![]()
Materials:
- Forester Coat pattern (Men's/Straight Fit or Women's/Curved Fit)
- Tape measure
- Ruler, scissors, and scrap paper for adjusting pattern
1). Measure your cross back. This measurement is taken from the top of the crease where your arm meets your back. You will need someone to do this for you.
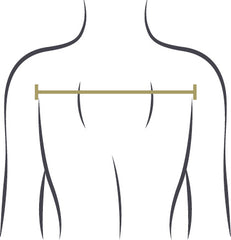
Divide your measurement in half to give you your half back measurement (we will be working on cut on fold/half pattern pieces).
The Forester Coat armhole seam is designed to sit 1 ¼” (3.2cm) beyond this crease on each side so add 1 ¼” (3.2cm) to your measurement.
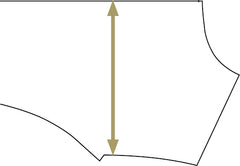
2). Take the Forester back pattern piece in your selected size and measure across the piece at the point of the double notches. Take the ⅜” (1cm) seam allowance off the measurement. This gives you the pattern cross back measurement.
3). Subtract the Forester pattern cross back measurement from your half cross back measurement.
Eg:
Your Measurement + 1 ¼” (3.2cm) = 8 ⅛” (20.75cm)
Pattern in your size = 7 ¾” (19.75cm)
Difference = ⅜”” (1cm)
Conclusion: You will need to add ⅜” (1cm) to the width of the half back
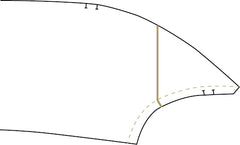
4). Draw a line on the pattern parallel with the grainline about 1 ¼” (3cm) away from the armhole.
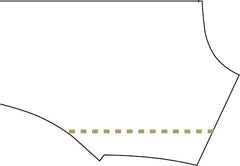
5). Cut through the pattern along the line.
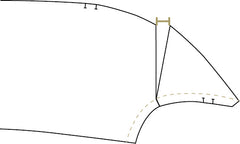
Slide the armhole section away from the body the amount you needed to add in (in our example = ⅜” (1cm). Tape in position.

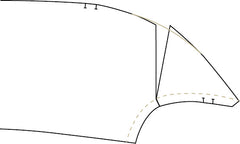
6). Blend the curve of the panel seam and straighten the shoulder.
Measure how big the gap is along the new panel seam and write it down - you will need this measurement for step 9.

Well done! Here is your new pattern piece.

8). Take the Forester side back piece (and then repeat the process for the side front piece).
Draw in the seam allowance on the armhole edge ⅜” (1cm) then draw a line from the middle of the armhole to the panel seam.
Cut along the line until you get to the seam allowance, then clip the armhole up to the seam allowance. Don’t cut all the way through! You need to pivot the pattern at this point.
9). Pivot the pattern open to the same amount the gap opened up on the back piece along the panel seam.
Tape in position.
10). Smooth off the panel seam.
...and you have an adjusted pattern piece.

11). Repeat all previous steps for the side front and front pieces.
12). If you are adding a yoke to your Forester then add a line to the yoke in the same place as you did to the back.

13). Cut through the pattern along the line and slide the armhole section out the same amount as for your back and front pieces.

14). Straighten the front shoulder seam.

15). Ready to cut!

Enjoy your custom fit Forester Coat!
![]()
Please join us at the Twig + Tale Facebook group to look for inspiration, ask questions, and of course, share photos of your lovely creations.
Read more about the Forester Coat here:
- Add an Interior Lining Pocket to the Forester Coat
- The Nestledown Baby Carry and Maternity Add-On
- Introducing the Forester Coat for Men + Women
~Cover Image by Sarah Connell~


