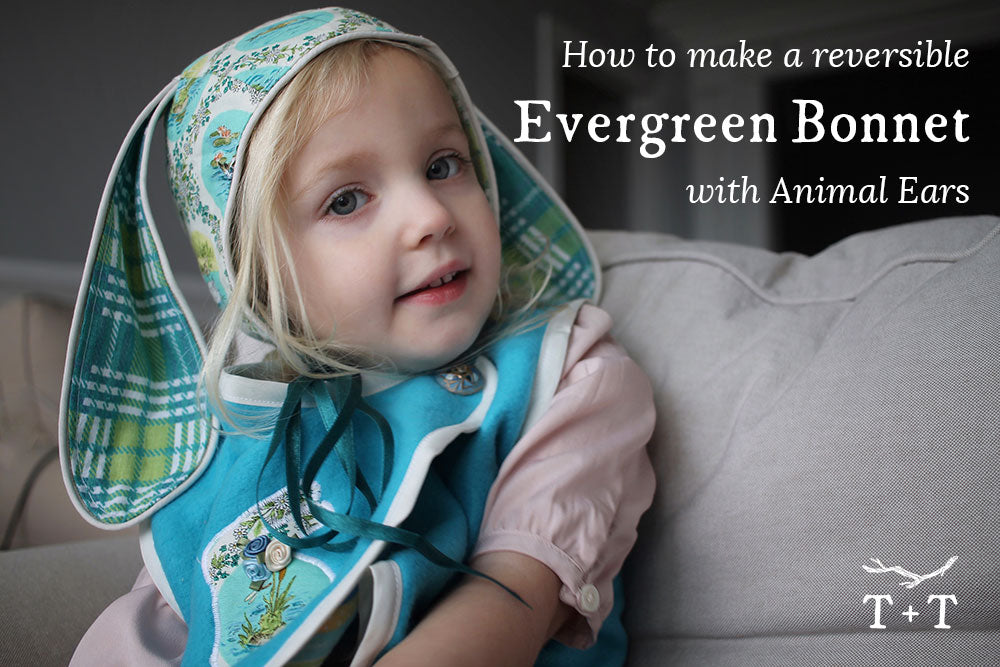
The Evergreen Bonnet is such a sweet, classic look, made all the more adorable with the addition of animal ears. The only drawback of adding ears? The bonnet is no longer reversible.
However, Shelley is joining us to share a clever technique for creating a neatly-finished gap in the seams that allow the ears to be pulled through to either side of the bonnet. The result is a beautifully-finished bonnet, with all the cuteness of ears, and the practicality of having two looks in one!
![]()
Materials:
- Ruler
- Erasable fabric marker
Assemble the Evergreen Bonnet pattern and cut fabric as directed in the pattern tutorial.
Create Gaps for Reversing Ears:
1. Fold ear pattern piece in half lengthwise. Measure the piece at the widest point, then add 1/4" (6mm), or round up to the nearest convenient measurement. This measurement will determine the size of the gap for the ear to fit through.
If working with stiff or thick fabric, such as fur, you may want to increase this measurement so that the ear will fit through the gap easily.

2. Sew and turn the ears as described in the tutorial, but do not baste them to the hood piece.
3. Pin the hood to the centre piece, marking the location of the first (single) notch with double pins or a fabric marker. Repeat for all four seams, two outer fabric and two inner.

4. From the position of the first notch, apply the measurement calculated in step 1, and mark with a pin or fabric marker. Here the measurement is approximately 2" (5cm).

5. Sew the hood seams, leaving a gap between the marks, being sure to backstitch at either end of the gap.

6. Press hood seams open. It may be helpful to finger press the gap first to maintain the correct seam allowance when pressing.

7. Continue following the Evergreen Bonnet tutorial to the end.
Sewing Ears to Bonnet and Finishing:
8. Fold ear pieces in half lengthwise and slide them through the gap, so that ear is sandwiched between the inner and outer layers of the bonnet. Pin in place matching lining and outer fabric as closely as possible.

9. Sew a rectangle around the gap using a 1/8" (3mm) -1/4" (6mm) seam allowance. This rectangle will secure the ear to the bonnet and finish the gap on both sides, allowing the ear to be flipped to either side.
Sew the rectangle in this order:
- Start 1/4" (6mm) before the gap on the ear side.
- Sew the long seam on the centre panel to secure the ear.
- Sew 1/4" (6mm) past the end of the gap.
- Turn 90 degrees.
- Sew to the other side, an equal distance from the seam.
- Turn 90 degrees.
- Flip the ear out of the way - this is very important!
- Sew down the other long seam.
- Turn 90 degrees.
- Sew back to the starting point.
Here is a view of the finished rectangle, with the ear pulled through to the opposite side:

All done! Enjoy your reversible bonnet with ears - two bonnets in one!

This method will also work for the Aviator Hat. You may still topstitch when joining the side hat piece to the centre (step 17), but will need to re-sew over that seam and create the rectangle around the gap to attach the ear and close the opposite seam.
This concept can also be applied to banded hoods, such as the Animal Hooded Scarf or Animal Cape. Just imagine the possibilities!
![]()
Please feel free to join us in the Twig + Tale Facebook group to ask questions, look for inspiration, and of course to share photos of your creations.
Shelley lives in Knoxville, TN with her husband, two dogs, three daughters, and four cats. Besides sewing, she enjoys crochet and swimming. Together with her husband she hosts two ultra-distance trail running races. You can find Shelley on Instagram @smgajus


