This pattern modification will work for the Grove Coat, Pixie Coat, Forester Coat, Traveller Cape, Overland Cloak, and Pathfinder, Crossroads and Trailblazer Vests.
These adjustments are designed for the adult sizes, but the techniques are transferrable to children's hood sizes.
The hood in Twig + Tale adult sized garments are designed to fit a head with a 24” (61cm) - Women's/Curved Fit or 25.5" (65cm) - Men's/Straight Fit circumference, on an average height person. To compare your head size, measure around the head just above the eyebrows, over the hair, keeping the measuring tape level. Half the difference between the two measurements will give you the amount you will need to adjust.
You may also like to consider neck length in your adjustment, as a longer than average can effect the hood size as well as head circumference.
Measure from shoulder to shoulder, over your ears and the top of your head. Halve this measurement, and add 2cm for seam allowances.
Now measure from the neckline notch, straight up to the top of the hood piece. If your measurement is longer than that of the hood, then utilise the “Add Height to the Hood - for a Larger Head Size” instructions below to add in the required height.
Add Height to the Hood - for a Larger Head Size
1. Slice through the middle of the hood pieces.

2. Move them apart the desired amount and tape another piece of paper behind the gap to secure the pieces. Blend the lines.

Add Width to the Hood
If you have long hair and you prefer to wear it in a bun or ponytail, you may need more room at the back of your hood.
1. Draw a diagonal line through the back curve of the hood, starting approximately 1” (2.5cm) from the back neck point, up to about halfway through the top of the hood. If making the Round Hood, also across the centre hood piece. Cut the line from the top, almost down to the back edge, creating a hinge.

2. Open the desired amount at the top of the hood and tape another piece of paper behind the gap to secure the pieces. Blend your lines.
If making a round move the centre hood pieces apart the same distance as the gap you created on the hood piece.

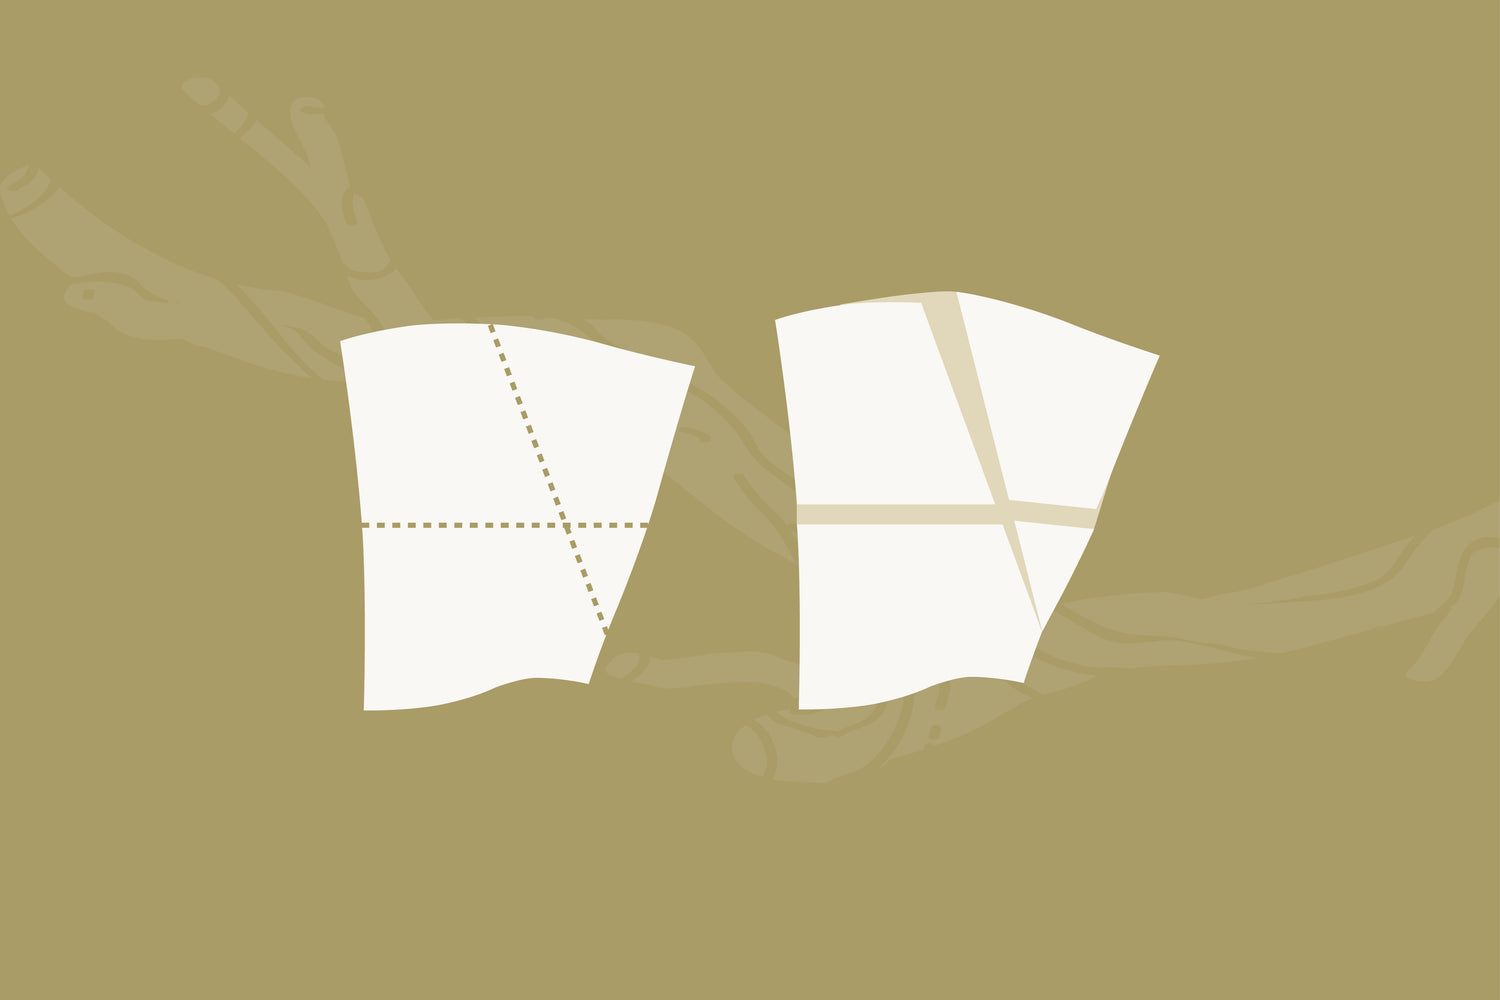
Add Height + Width to the Hood
If you have a lot of hair, your hair is long and very curly, or you wear a headwrap that significantly increases your head circumference, you may need to adjust your hood using a combination of the two techniques above. This is also the best adjustment for creating a dramatic oversize hood!
Measure your head wearing your hair or headwrap as you would normally intend do. Divide the difference between this measurement and 24” (61cm) - Women's/Curved Fit or 25.5" (65cm) - Men's/Straight Fit by four. This is the amount you will need to add to both step 1 and 2.
1. Draw the line across the hood first.
2. Separate the two pieces as desired (shown in gold). Tape another piece of paper behind the gap to secure the pieces.
Draw the line across the back curve of the hood as instructed in the Hood Width adjustment.

Cut to the back edge and pivot out the desired amount as above (shown in green).

![]()
Read more Twig + Tale sewing tutorials here:
- Interlining a Garment for Warmth - Grove, Forester, Pixie
- How to Add a Knit Cuff
- How to Sew "Kissing Elephant Sleeves" for Coats


