For wheelchair users, standard coats can present movement and mobility challenges. This alteration for Pixie Coats and Grove Coats will especially suit full-time wheelchair users who want to stay warm and wear a fabulous coat while still enjoying comfort and functionality.
![]()
Materials
- Pixie Coat or Grove Coat pattern pieces
- Measuring tape
- Scrap paper
- Tape
- Ruler
- Pencil
Modifying the Pixie Coat:
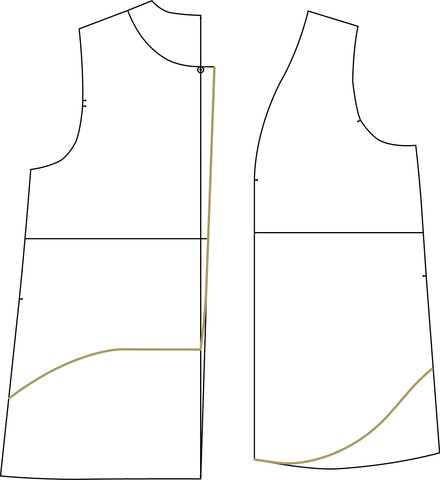
1. This step is easier to do when you have a friend or assistant. Measure your back length from the high shoulder point (on your shoulder close to your neck) down to the seat of your chair. If you wish the jacket/coat hem edge to be slightly above the seat - so that is doesn't catch when you are getting into the seat - then stop the measurement just short of the seat surface.
2. Apply this measurement to the Back pattern piece:
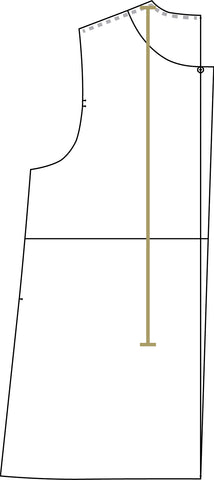
3. Draw a straight line at your marked measurement, across the Back pattern pieces, 90º from the centre back fold line to the side seam. Add a 3/8" (1cm) seam allowance below this straight line.
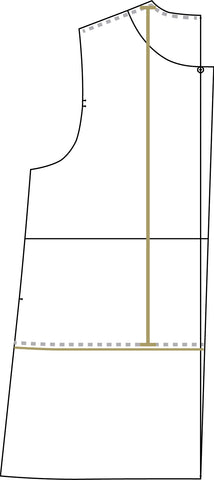
4. Position your Front pattern piece along the sideseam of the Back with a 3/4" (2cm) overlap. Smoothly curve the seam allowance line from the centre back along to the front, so that it gradually meets the original coat length at the front edge.

5. Create a new hem facing piece by tracing off the new hem shape onto a new piece of paper. You can use the old facing piece as a guide for the width
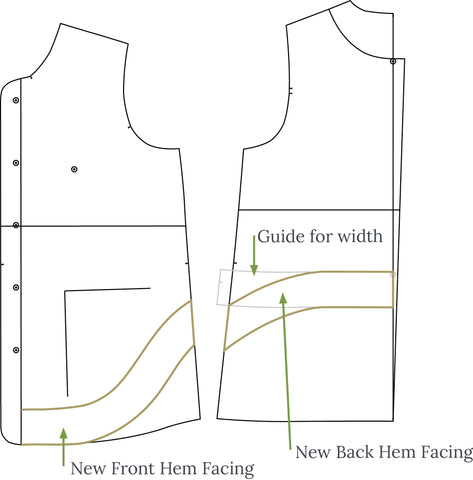
6. Lay the front facing over the front piece, mark in the edge of it on the new front hem facing then add x2 seam allowances to the front hem facing front edge 3/4" (2cm) . You can also cut your back facing on the fold if you wish, simple trim off the 3/8" (1cm) seam allowance on the centre back edge.

7. Apply the new hem shape to the front lining (back lining already done - you just need to trim off a little width on the centre back hem if needed.
8. Complete the rest of the coat as per the sewing instructions in your tutorial.
Enjoy your new Pixie Coat!
![]()
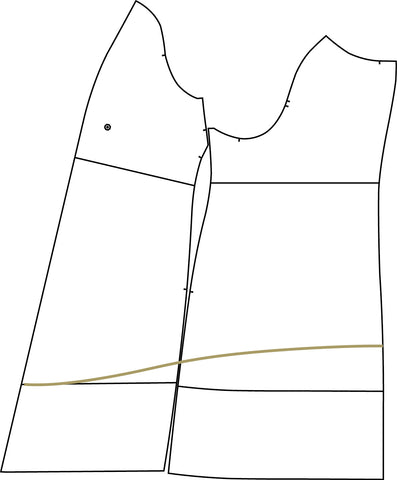
Modifying the Grove Coat:
Measure your back length from the high shoulder point (on your shoulder close to your neck) down to the seat of your chair.
If you wish the jacket/coat hem edge to be slightly above the seat - so that is doesn't catch when you are getting into the seat - then stop the measurement just short of the seat surface.
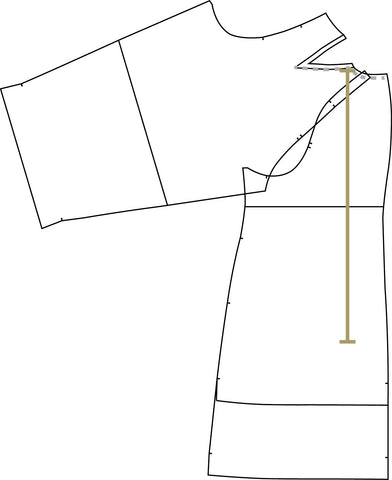
2. You will now need to overlap the sleeve pattern onto the back raglan seam by 3/4" (2cm), in order to find the high shoulder point on the pattern. The high shoulder point for the Grove Coat is on the shoulder dart.
You can now apply your high shoulder point to seat measurement to the Back pattern piece, extending the measurement line to reach the centre back seam:
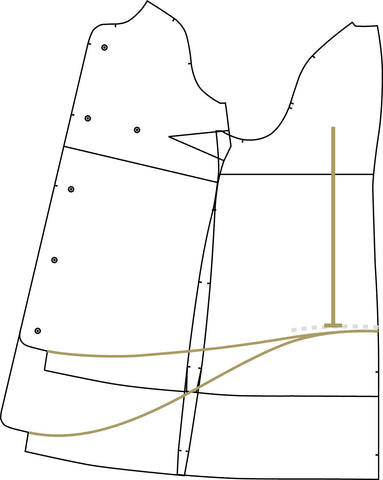
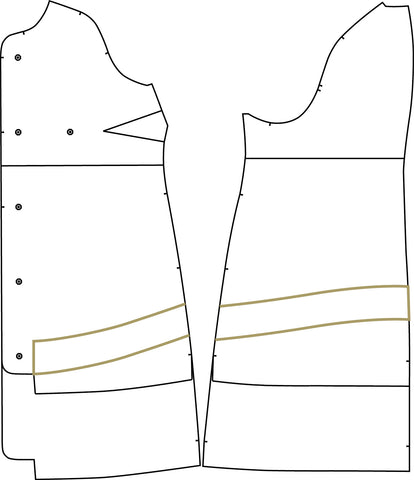
The shape will differ depending on the length you desire at the front of the coat:
![]()
Read more Twig + Tale sewing tutorials here:


