If you live in a part of the world which enjoys a winter wonderland of snowy weather then you may need more warmth in your outerwear than only an outer and lining can provide. To remedy this, you may wish to add a layer of insulating material - interlining - as well.
This method can be used for coats and vests such as the Pixie Coat, Grove Coat, Forester Coat, Pathfinder Vest, and Trailblazer Vest.
![]()
Fabrics:
Many sewists like to use a polyester based product, known as Thinsulate™ for their interlining layer. Designed to take the place of feather down, Thinsulate™ is constructed of layers of fibres that are melted in various designs - effectively "quilting” the layers together.
If you would prefer more naturally derived materials to polyester interlining, wool or bamboo batting are great options. When making your selection of either batting type, bear in mind that they need to be needle felted or firmly quilted to maintain their shape. Give your batting a gentle pull, if it separates easily it will not be suitable as over time it may break apart and drop into the hem.
Please note that more loosely constructed batting can still be used as a layer for warmth. Instead of using it for interlining, securely quilt your batting to your lining (or exterior fabric) before cutting out and assembling the garment. You can read more about this method in the following blog post: How to Make Quilted Fabric.
Adding an interlining to your coat may mean your coat will need a more gentle hand wash for maintenance, but how often are you washing a winter coat anyway?
Sizing:
Because an interlining layer will add bulk to the inside of the coat, you will find that a coat cut to your measured size will fit more tightly than without it. You may wish to size up one or two sizes to allow for the interlining thickness.
Cutting:
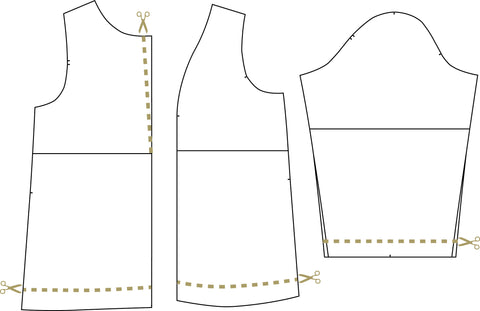
1. You will be sewing the interlining layer onto the lining pieces so to begin, select the lining pieces from your pattern or bring them up onto the projector.
2. Mark a line 2" (5cm) up from the hem edge on the pattern. This will be the hem line of the interlining. The interlining should not extend to the lining hem to ensure your lining hem folds will still sit flat.
If you require extra warmth at the cuff we recommend adding a knit cuff to this area. To learn how to do this technique, please see: How to Add a Knit Cuff.
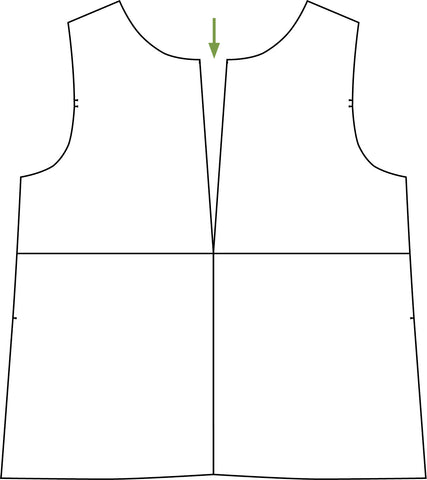
3. The back lining in the Pixie and Grove Coats have a pleat at the top, but interlining will add too much bulk if included in that detail, so we recommend you trim the interlining away from this area. If cutting the back on the fold, simply fold the lining back at the notch creating a deep "V" cutout along the fold line.
4. If cutting a Grove Coat or other styles with darts in the linings, you will need to trim away the interlining from the dart area before sewing. This will reduce the thicknesses and allow the darts to sit flat and smooth

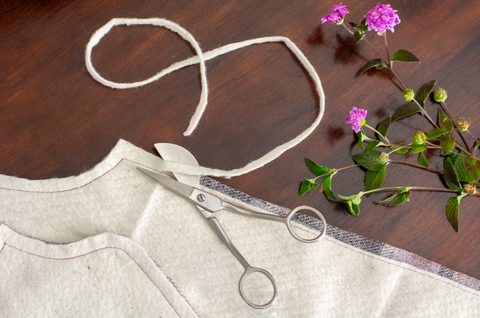
5. Baste the interlining to the lining pieces with a scant 3/8" (1cm) seam allowance then trim back the interlining as close to the stitching as you dare! Remember when basting the interlining will stop 2" (5cm) short of the the lining hem.
6. TAKE CARE! When pressing your linings if you are using Thinsulate™ or other polyester or nylon based products. They are very heat sensitive and will melt onto your iron. We recommend using a pressing cloth or pressing from the lining side of the seams.
7. Once basted in place and pressed, pleat the back lining, sew the darts (if any) and sew the linings together and into your coat as your tutorial instructs.
You will now have a wonderfully warm, interlined garment!
![]()
Read more Twig + Tale sewing tutorials here:
~ Lovely cover image courtesy of Stephanie Unertl ~


