Your overalls are almost complete! Today, we will add some straps and other finishing touches.
Straps
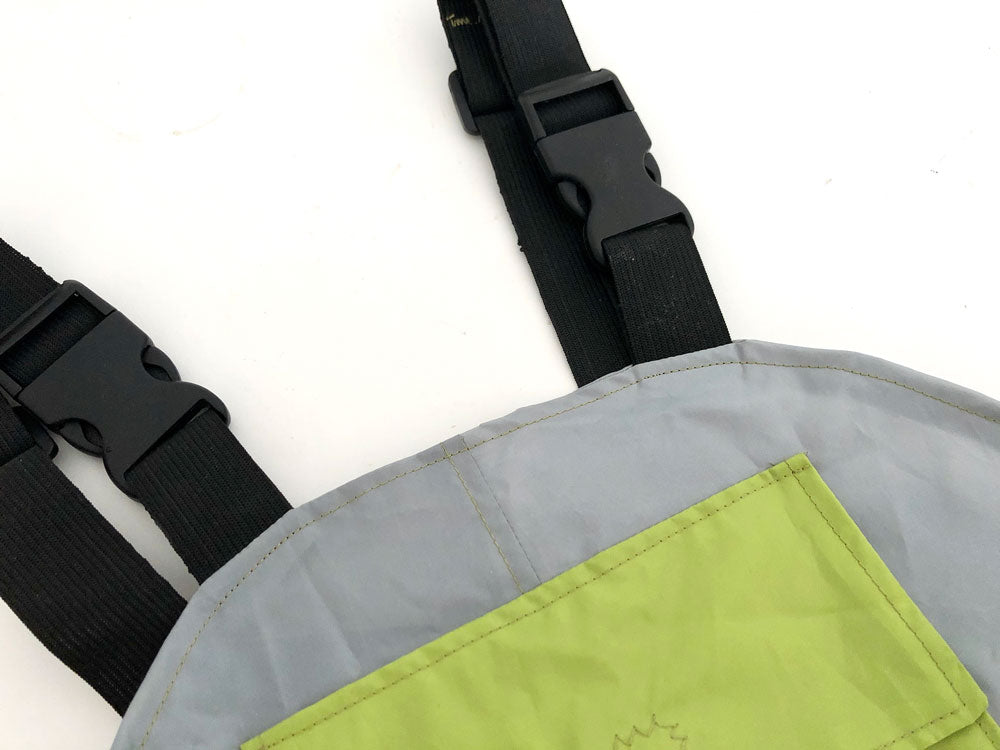
The Rainhaven Overalls pattern shows you how to use two different types of connectors for your straps – plastic buckles and D rings. Both options are easily obtainable from fabric stores, hardware stores (look in the section with webbing/strapping) or recycled from old bags.
Your straps and front buckle attachment pieces are sewn to the overalls in between the main pants and the facing. This leaves the ends securely tucked away and gives a lovely finished edge to the top of your overalls. You can choose to finish the bottom of your facing by turning under and stitching. You could also leave it raw or simply overlock/serge the edge.

The pattern calls for elastic for the straps/buckle attachment pieces. A soft knit elastic is a good comfortable choice, especially for smaller people, but you may want to choose a sturdier woven elastic for overalls that will be used more heavily or for big people. We have a blog post on elastic to help you decide what will be the best choice for you.
Some of our testers chose to use other materials and connectors for their straps – matching fabric straps and webbing were both used, and people played with different types of buckles, tie straps, buttons and more! You can let your imagination run wild. BUT we strongly recommend that you make a good portion of the straps (or at the very least the front buckle attachment) from elastic as it really adds to the comfort of the overalls as you move around in them.
Threading plastic buckles can be a little confusing. Follow along with the video to help!
Waist Snaps
The waist of the overalls is loose enough to pull up over the hips and clothing. I find the loose fitting waist to be great for fitting over warm winter layers, but if you would like to add more shaping to this area, you can add a set of snaps to each side. Plastic snaps would be preferable to metal as they won’t rust when they get wet.

Elastic Casing
If you don’t want the bottom of your overalls to have elastic, you can simply try them on your model and work out what length you would like to hem them, or the pattern tutorial provides a recommended amount to trim off allowing enough length to turn the hem up and sew.
If you are adding elastic, ensure that you sew your casing wide enough to accommodate the elastic you are using. The pattern recommends 20mm elastic for the ankles, but if you only have narrower or wider elastic, adjust the casing to suit. If you are adding stirrups, don’t forget to insert one side of your stirrup elastic before you sew your casing.
You can use adjustable button hole elastic for your stirrups to make them adjustable. I harvested some buttonhole elastic from the back of a worn out pair of children’s pants. Simply attach the elastic on the inside of the cuff, finish the other end of the elastic and then sew a button onto the other side of the pants leg for the elastic to button on to at the right length. This is a great option on children’s overalls as it gives you more space for growth.

Seam Sealing
Seam sealing is optional. You may want to test your seams by running under the tap or immersing into a bucket of water to see if you need to do this at all (I have found my seams hold up really well!) But if you want to seal your seams, there are a few choices.
Your pattern gives you instructions for using seam sealing tape. This is the only time you will use an iron anywhere near your waterproof fabric! Use the tape with baking (parchment) paper and iron it onto the inside of your seams.
You could also use a paint on seam sealing urethane product. Follow the instructions on the product and paint it onto the inside of your seams.
If you are using a natural material, use some extra beeswax, waterproofing block or your homemade waterproofing balm (see this blog post) on all of your seams. Remember you can reapply these products any time during the life of your garment if you feel it needs a bit more protection.
![]()
Congratulations on completing your Rainhaven Overalls (or pants or hats!). We would love to see your creation in the Twig + Tale Facebook Chat Group and on Instagram with the tags #twigandtale and #rainhavenoveralls. Now go have fun in your rain gear while feeling like a sewing superstar!
~ Images by Tracey Wright, Kristin Hustedt
