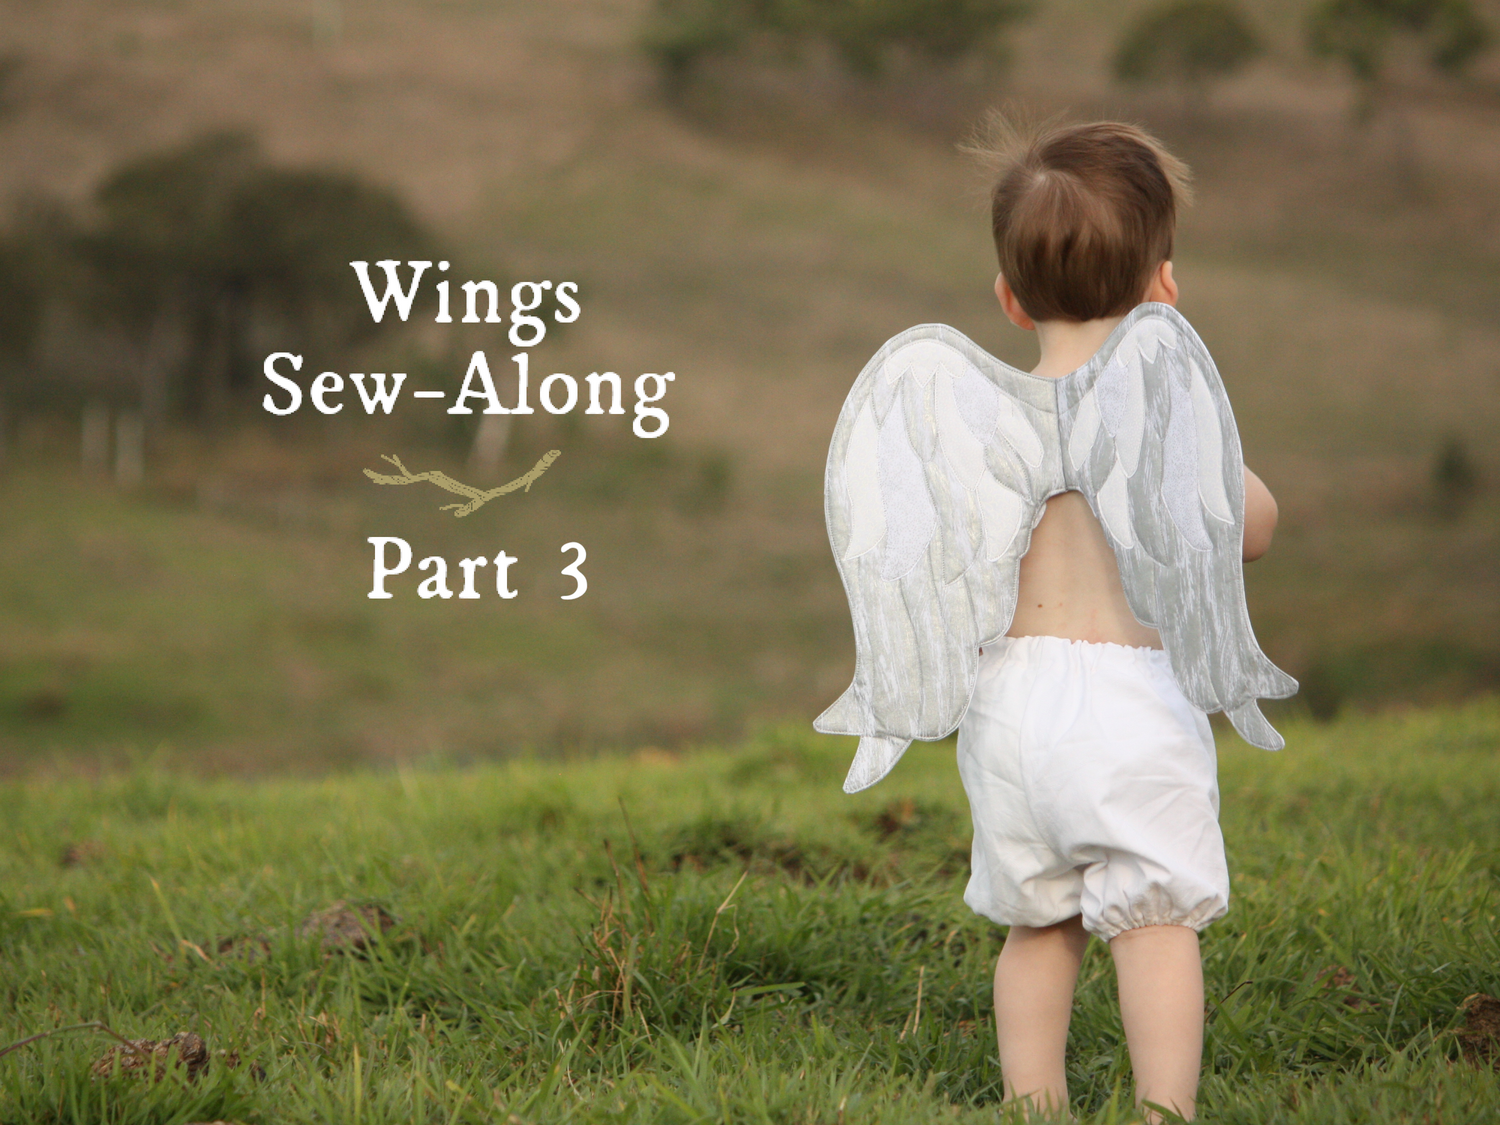
Hello, and welcome to Part 3 of the Wings Sew-Along. How are your wings coming along? I'm excited to see how they are looking!
![]()
The steps for Part 3 are again quite varied, with some time spent at the sewing machine, and a fair bit of time spent turning, clipping, and pressing.
Also, if you haven't switched to a heavy-duty sewing machine needle yet, now is the time to do it - there will be quite a lot of layers to sew through from here on in. I used a 100/16 jeans needle.
Goals for Part 3:
- Sew straps (if you haven't already)
- Baste straps to wings
- Sew front and back wings together
- Trim and clip
- Turn and press
- Topstitch
Sew straps and baste to wings ("Sewing the Straps" and "Joining Together" in tutorial)
This is actually at the very beginning of the tutorial, but I like to save this step for a time when I'll be sitting down at my sewing machine, just to streamline the process. If you haven't sewn your straps yet, now is the time!
Sew front and back wings together ("Joining Together" in tutorial)
If you happen to have wonder clips, this is a perfect time to use them, as it can be a challenge to pin through all of the fabric and interfacing layers.

Another tip for this step is to clear your sewing table, as we will now be sewing the full width of the wings. It can be somewhat tricky manoeuvring the wings through the machine, and if there is anything within range, it will get knocked off the table! On my first try, the sewing machine was sitting quite close to the serger, and the wings managed to get themselves completely tangled in serger thread! Save yourself some trouble and clear a proper space to work.
When you're stitching the front and back wings together, take it slow around the curves so that the beautiful wing shape is preserved. You may find it helpful to stop frequently, with your needle down in the material, and lift your presser foot to smooth and turn your project slightly.
Trim and clip wing edges ("Joining Together" in tutorial)
"More trimming and clipping?", you may be thinking. It really is worth it, I promise. It's all in the name of having the wings sit nicely once they are turned, and having less bulk in the seam allowance will make topstitching much easier. Turn on that podcast, audiobook, or movie and relax!
Turning the wings and pressing ("Joining Together" in tutorial)
Now it is time to turn the wings right side out. Turning the wings can be a bit of a wrestling match - just stick with it and you will get there! In fact, this is another task that is best done with a movie (and perhaps some reward chocolate)! To begin the turning process, I put a hand inside the wings so that I could push the wing tips out with one hand, while pulling them out with the other hand.

You may require a variety of poking tools to help turn through all the curves and points - I found the blunt end of a chopstick to be useful - fairly fine, but not sharp enough to poke right through the fabric.
The tails of the Luna Moth are particularly challenging, but with some perseverance they can be turned beautifully. Take your time and really work the wing edges by rolling them back and forth between your fingers to ensure that they are properly turned out and will sit as nicely as possible.

Once you are satisfied with your wing-turning, it is time to press. Again, this step requires taking some time to do it well. As mentioned in the pattern, pressing helps to compress the batting and firm up the wings - they really start to take shape here. Apply firm pressure as you iron and press down in one spot at a time, rather than swishing the iron back and forth.
Topstitch
When topstitching the wing edges, go slowly around the curves. For sharp curves like the wing tips and Luna tails, I find that it works best if a do a couple of stitches, stop with the needle down, lift the presser foot, and adjust the angle of the wings manually before continuing. If you're sewing through a particularly thick spot, it may be necessary to hand crank for a stitch or two. This is where all the trimming we did previously really helps.
![]()
We now have wings that are beautifully-turned, pressed, and topstitched! Don't worry if there is still some flop to the wings - stitching on the appliqué will add firmness.
We'll be back soon with Part 4 of the Wings Sew-along, allowing time to approach the tasks in Part 3 at a fairly leisurely pace.
If you have any questions or comments, please leave a comment on the Twig + Tale Chat Facebook group.
Also, please feel free to share photos of your wing progress on the Twig + Tale Chat Facebook group or on Instagram tagged with #TTWings, #tTTWingsSewalong, and @twigandtale. We'd love to hear how things are going! ![]()
<Lovely cover image by Angela Jensen>
