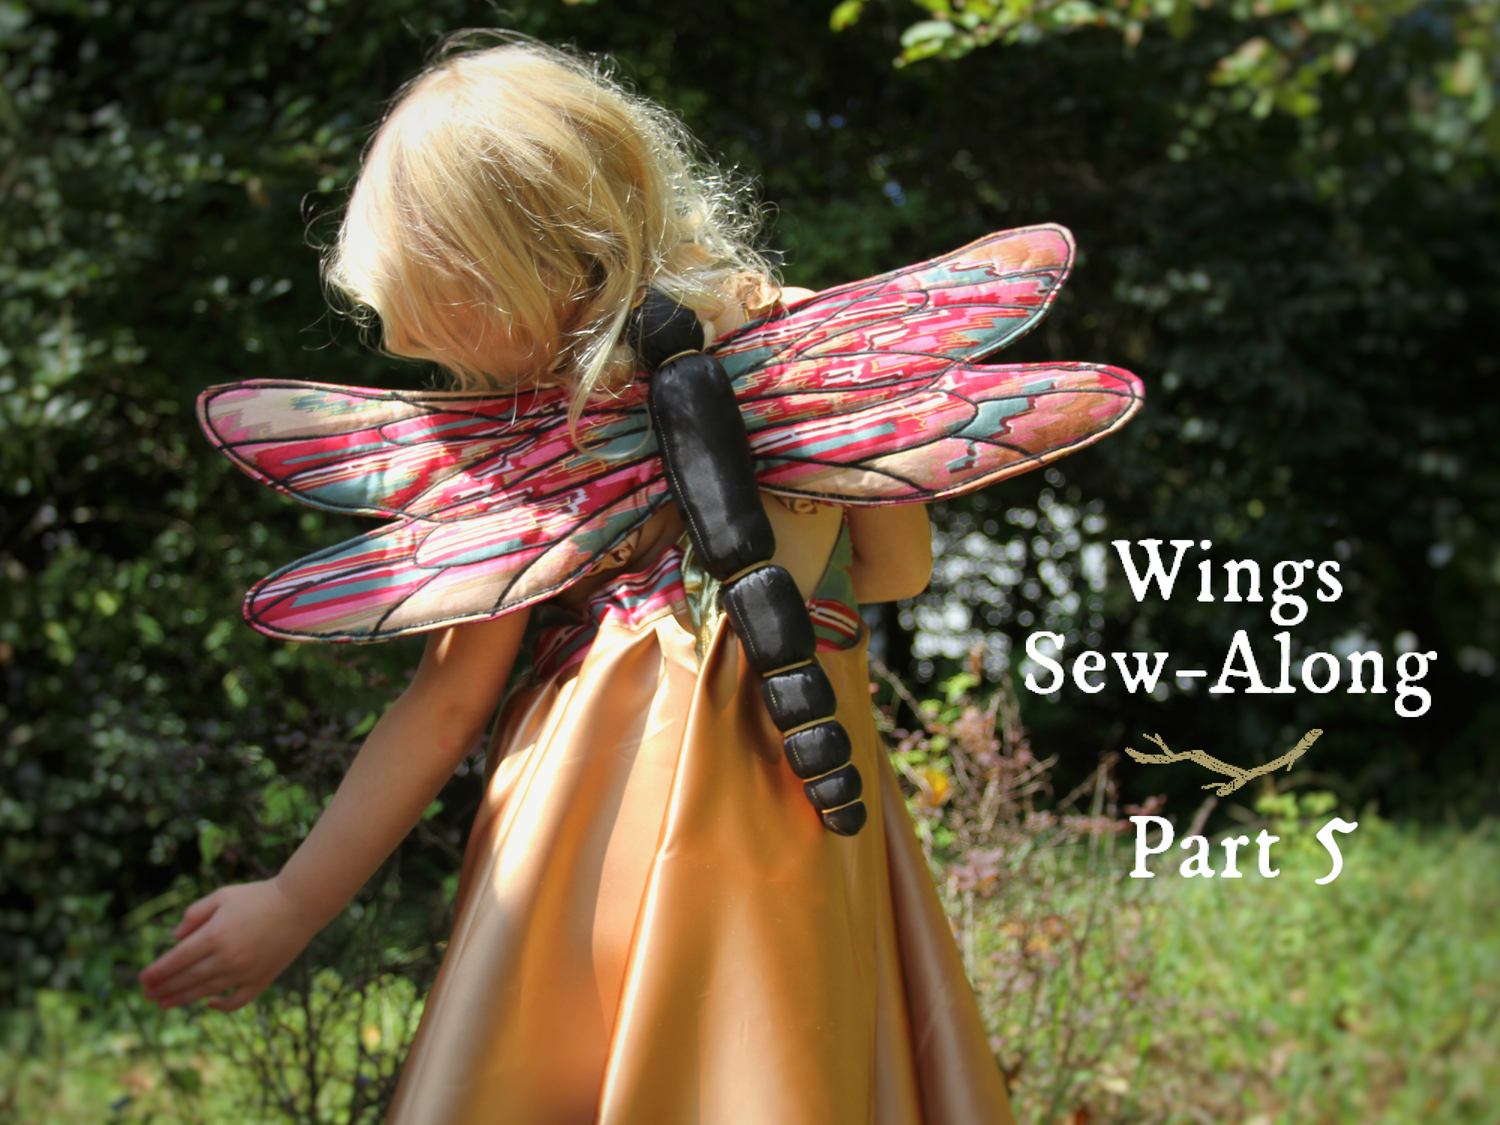
Welcome to Part 5 of the Wings Sew-Along - we are almost finished! We hope you're enjoying the process of taking on this project - it has been a lot of detailed work, but soon you will have a pair of lovely completed wings.
![]()
We are in the home stretch today, with only the straps and body to finish. A number of people have asked if the body is necessary, and the answer is that it is not necessary. The wings will work just fine without the body, though we do love the "insect-y" look that they add, especially for the dragonfly - like one has perched atop the back in a bit of natural magic!
Goals for Part 5:
- Sew strap loop and attach straps
- Sew spine
- Sew and attach body (optional)
Finishing the strap loop and straps
If you happen to have your Wing recipient handy, it really is a good idea to try the wings on to get a perfect fit. Try not to tighten the straps too much, as they have a tendency to ride up if the elastic is too tight.
The adjustable snap method is a wonderful idea if you don't have the recipient handy, the wings will be shared by multiple children, or wings will be worn over different weights of clothing.
Sew spine
This is another step that really helps to stabilize the wings and add structure. Sewing the spine involves stitching through a lot of layers. If you're having difficulties, try starting the spine seam down a bit from the top part of the wings - don't try to start stitching right from the top, because the seam allowance is too thick here.
What worked for me was to start around the mid-point of the spine, sew down to the bottom, pivot, sew as far as I could to the top (sewing over the loop piece as described in the instructions), then backtack to secure the seam.
Sew the body and attach to wings
After sewing the body, there are a number of ways that it can be sectioned. I chose to use perle cotton, wrapped tightly to give the head some definition, then stitched in a criss-cross pattern to add a decorative element. From the side, you can see that the body is hand-stitched to the wings and any knots from sectioning the body are nicely concealed by the wings.

Here is the finished body:

The wings are now finished!
![]()
Here are my completed wings, modelled on a fall day by my 8 year old. She's happy to slip them on and wear them for hours at a time, so they must be comfortable! They have now been worn while fluttering around the park, jumping on the trampoline, painting pictures, and baking muffins. I feel good knowing that they are made of quality materials that will last and be enjoyed for a long time to come. Plus, they are unique and have been stitched with intention and love.

Thank you so very much for participating in the Twig + Tale Wings Sew-Along! It has been an absolute pleasure to sew wings with you. Be sure to share a photo of your wings on the Twig + Tale Chat Facebook group or on Instagram tagged with #TTWings, #tTTWingsSewalong and @twigandtale.
![]()
<Cover image by Shelley Gajus>
