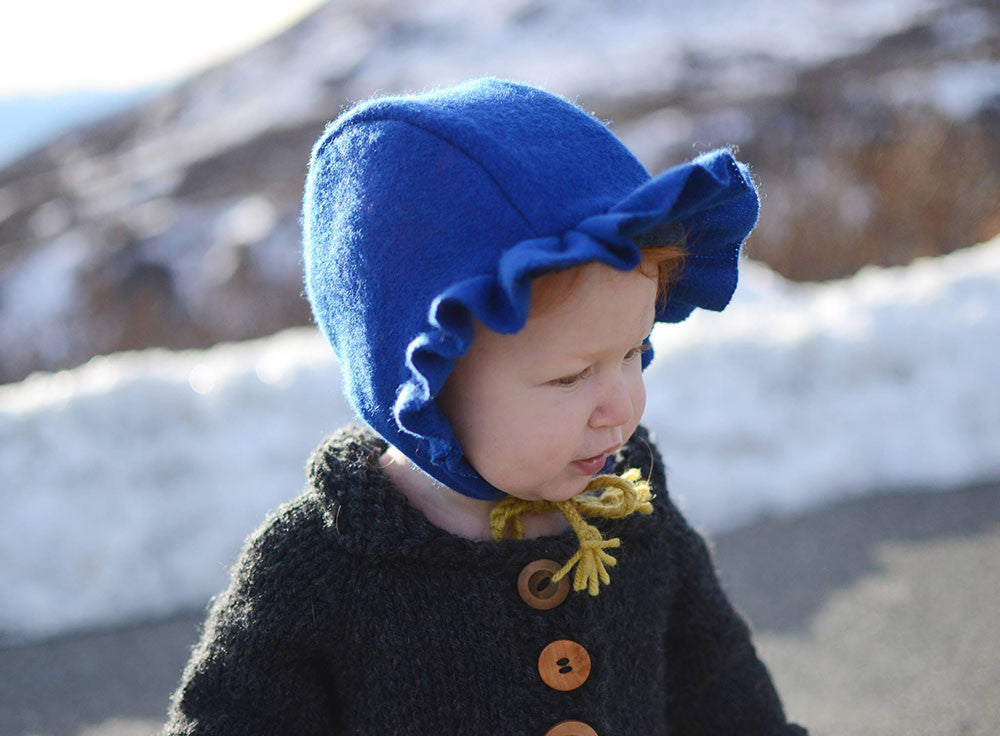
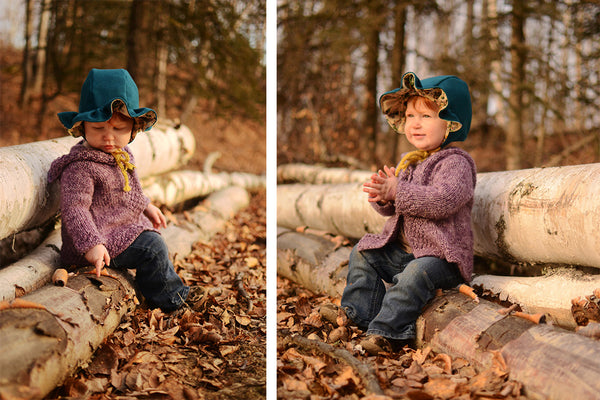
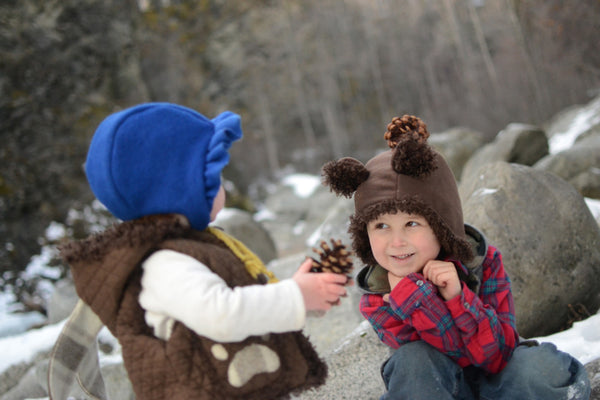
Inspired by the flutter sleeve of the Pathfinder vest, this delightful brim adds a sweet charm to your Evergreen Bonnet
![]()
Before We Start
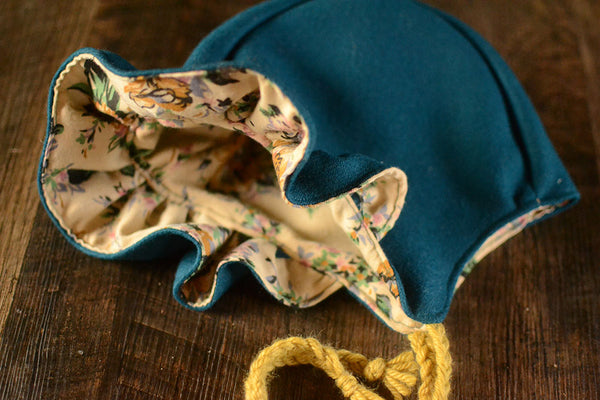
In addition to the bonnet pattern pieces, cut out 1 exterior and 1 lining ruffle piece (mirrored) or 2 exterior ruffle pieces (mirrored).

Adding interfacing to lightweight fabrics may help the ruffle stand up instead of drooping down in front of the eyes. If using interfacing, cut one or two pieces, trimming the seam allowance off before ironing it on.
If you prefer a smaller, more delicate ruffle – cut ¼”-1/2” off the length of the ruffle pattern piece, on the straight edge, before cutting out your pattern pieces.
If using a heavier weight fabric, such as wool blankets, you can use one ruffle piece, without a lining. Simply finish the edge with a zigzag stitch or trim with sharp scissors, pinking shears, or cover with bias tape.
Creating the Ruffle
Place both ruffle pieces right sides together and stitch along the curved edge using a 3/8” (1cm) seam allowance. Clip curve and turn right side out. Press well.

Top stitch the curved edge using a 1/8” (3mm) seam allowance.

Gather the fabric by using a basting stitch along the straight (unfinished) edge of the ruffle piece, 1/8” (3mm) away from the edge. Simply change your machine settings to a long stich length with low tension, leaving long tails at the beginning and end of your stitch lines.
Pull the bobbin thread gently to gather the fabric and distribute the ruffles along the ruffle piece.

Proceed with the pattern instructions for assembling your bonnet hoods, but don’t sew them together just yet!
Attaching the Ruffle
Baste the ruffle onto your exterior hood with a 1/4” seam allowance. If your ruffle has an exterior and a lining, place the exterior toward the exterior hood piece. 
Ensure that your hood pieces are right sides together, lining over exterior. The ruffle piece will be sandwiched in between the two hood pieces as per pic below. 
Join all three layers, attaching the ruffle about an inch from the bottom of the hood pieces, where you would insert the ties you designed. You may like to try the bonnet on the child at this point to ensure a favorable position.
Once you have your ruffle attached between the two hoods (insert your ties now if making the Design-Your-Own Ties version), sew along the outside edge of the bonnet, as per the pattern instruction, joining the hood pieces, while attaching the ruffle. Don’t forget to leave a section open for turning!
Clip curves, turn right side out, and inspect to insure that you have sewn through all three layers. If all looks well, continue with topstitching around the outside edges of the bonnet. Press well and admire that sweet bonnet.
Don’t forget to share in the Twig + Tale Facebook Group. We would love to see your creations!
![]()
Renia lives with her husband and two children in a tiny home in The Last Frontier - Alaska. Her greatest passions are sewing, photography, simple living, outdoor cooking, and raising her children with an emphasis on imaginative play and nature - no matter the weather.
Follow her on Instagram @flyingelephant_ak


