If you have used a Twig + Tale® pattern before you may have noticed that we don't provide cutting layouts. This is because all fabrics and fabric widths vary and we encourage repurposing pre-loved fabric, so we don't want to overwhelm you with all the options! Instead we thought it best to provide some general guidelines for cutting out your garments which you can use for any pattern and fabric.
![]()
Woven fabrics
Woven fabrics are created on a loom. Each side of the fabric is called the selvedge, and the threads running parallel to the selvedge (warp) are what is known as the straight grain or lengthwise grain. These threads are generally tighter and straighter than the ones which run across the fabric (weft), also known as the cross grain.
Marked pattern grainlines should be laid to run along the straight grain, parallel to the selvedge. The inherent qualities of the warp threads also mean that its better to cut long, straight pieces like ties and belts parallel to the selvedge. This way, you will find that they will be easier to sew and press.
Knit fabrics
Knit fabrics are produced on a knitting machine. Though knits do not technically have a grainline, most of the time the stitches running parallel to the selvedge are regarded as the straight grain. The greatest stretch of the knit generally runs across the fabric, along the cross grain, so cutting pattern pieces with the straight grain ensures that the greatest stretch is going around the body when worn. There are exceptions to this so pull at your fabric before cutting to see which direction the greatest stretch is running on the fabric. If your fabric is a "two way" stretch (both directions feel the same when you pull them) then choose the direction you think the fabric or fabric print will look best on the body.
Right/Wrong side
All fabrics have a right and wrong side, although some (like quilting cotton) are very similar. If your fabric has distinct right and wrong sides, then extra take care in cutting and handling, to make sure that you end up with the same side of the fabric on the outside of your garment. Easily achieved with printed fabrics, it is easy to confuse sides with solid fabrics like a twill, for example. One way to help keep track is to stick a sticker to a corner of each cut pattern piece. You could also mark the wrong side with tailor’s chalk as you are cutting so that to keep from mixing up right and wrong sides when sewing.
Nap/Pile/Shading/One way prints
Some fabrics have a pile or nap, and others can look a different shade from one end of the cloth to the other. Some fabric prints have a design which looks upside down in one direction, or a border print that runs from one selvedge toward the other. These are all "one way" fabrics. When using these fabrics you must always cut your pieces oriented in the same direction. For example keeping the hems of all the pieces on the left of you as you are cutting out.
When using a fabric that has a pronounced nap/pile (corduroy and velveteen for example) you would most often cut the fabric so it feels smooth as you glide your hands down the body, instead of up. Exceptions to this include cutting velvet with the pile running up the body so that it appears darker and luxurious.
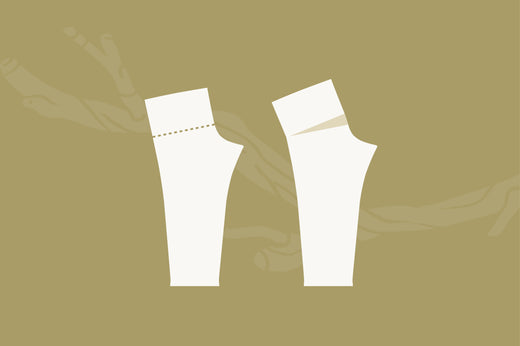
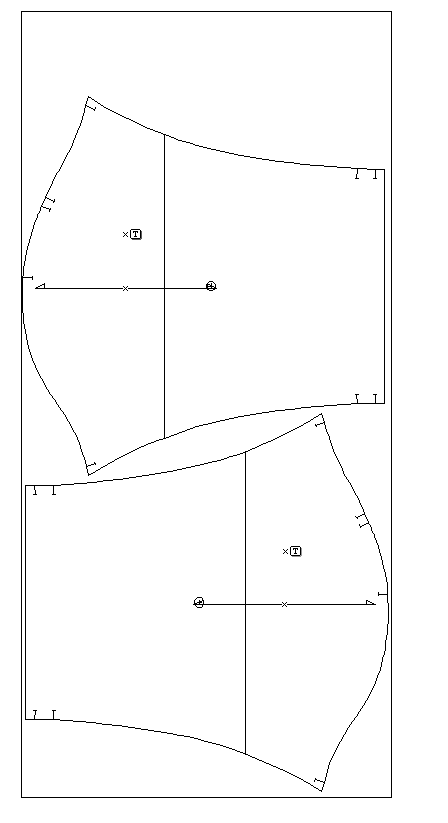
This back and sleeve are cut "two way":

This back and sleeve are cut "one way"


The Twig + Tale® fabric requirements are calculated for cutting "two way" or on a fabric on which the pieces can be cut in two directions. If you have a "one way" fabric you will need to allow more yardage than the fabric requirements given in the tutorial. There is not a general percentage we can give you, as our patterns vary a lot in shape and size, so we recommend laying out your pattern pieces on the floor (or projecting them) within your fabric width and seeing how much more fabric you will need.
Interfacing
Some pattern pieces require interfacing for stability and durability. Common pieces which require interfacing are collars and cuffs, where we most often recommend iron on or fusible interfacing. The best practice for iron on interfacing is to apply it to your fabric before cutting them to shape. This is so that if the interfacing and ironing process causes the fabric to shrink then your piece size is not affected. When cutting out your pieces that call for interfacing, cut roughly around the piece with a perimeter of about 3/4" (2cm). Cut the interfacing slightly smaller, by around 1/8" (3mm), than your pattern's shape. This stops it from sticking to your ironing board. Iron the interfacing to the fabric then cut to the shape of the pattern piece.
Laying out your pieces
Start with your largest pattern pieces and place them first. It is easier to fit the smaller pieces around them later. In Twig + Tale® patterns formatted for printing, symmetrical pieces appear as only half their width and are intended to be cut on the fold. To achieve this, you would fold the fabric in half along the lengthwise grain, then place the pattern piece as indicated along the folded edge.
If you have a larger "cut on the fold" pattern piece, then fold your fabric in half and start with that piece first, then see which piece fits beside it. In our example from earlier the sleeve fits well beside the back piece. Seeing as we need 1 pair of sleeves this works great!

Sometimes you may be able to get two of your folded pieces into one section neatly by folding the selvedges into the middle of the fabric, like this:

In this next example we have done a combination. The first section of fabric is folded into the middle, the second is folded in half. As you can see the smaller pieces have been fitted around the larger pieces once they were placed.

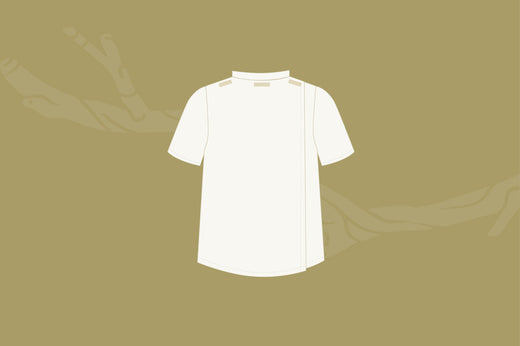
Sometimes the best layout is to have the fabric out flat, this happens when the pattern pieces are too wide to fit into the folded fabric. Like in this example:

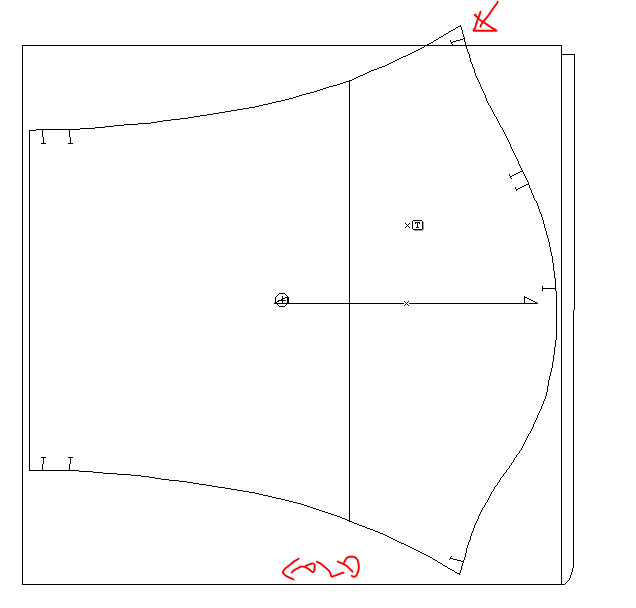
If this is the case, then open out the fabric and lay the pieces "two way" if your fabric allows it. You will still fit them into the same width but turning the pieces allows the shapes to fit better on the cloth:

This technique will not work on a "one way" fabric which is why you will use more fabric cutting "one way.” If you need to position a "cut on fold" pattern piece with the fabric laid open: first place the piece on the cloth, then flip it over at the fold line before placing your other pieces. Don't forget that the space left behind is already being used by your flipped piece!
As you can see there are many ways to approach laying out your pieces on the fabric. The best method is to start with the largest pieces then work slowly and carefully through your other pieces, trying out several options until you have the best use of your fabric you can get! It can be tempting to rush into cutting out the pieces but take a quick break, make a cup of your favourite sewing beverage, then come back and take another look at your layout. Double check for right and wrong sides, cut on fold pieces, number of pieces, interfaced pieces and fabric direction. Enjoy the process of putting your garment puzzle together before cutting it up!
![]()
Join us in the Twig + Tale Facebook group to ask questions, look for inspiration, and of course to share photos of your lovely T+T creations.
~ Cover image by Muriel Romero ~