Pattern weights are a great alternative to using pins, especially when using certain fabrics, such as waterproof or special fabrics when you wish to avoid to leave pin-holes. Here is a free tutorial for some simple pattern weights you can make with readily available materials.
They also make lovely bean bags for the Waldorf classroom.
![]()
Step 1
For each pattern weight, cut 2 small squares of scrap fabric.
In this example I used 4" (10cm) squares of quilting cotton and used an overlocker/serger to finish the edges. You could also use pinking shears or a zig zag stitch.

Step 2
With the squares right sides together, stitch around 3 sides, backstitching at the start and the end.

You now have a little bag shape.
Step 3
Press the side seams open and bring them together to form a little pyramid shape.
Clip/pin at the seams.

Step 4
Sew about 3/8" (1cm) from one side and from the other side to just over where the seams join. Backstitch at the start and end of each stitch line. There should be approximately 2cm of opening.

Step 5
Press the seam allowances open, and then use a chopstick to help turn the pattern weight right side out. Gently push out the corners.

Step 6
Push a small funnel into the opening and fill your pattern weight to about 2/3 full. There are a number of things you could use to fill your pattern weights. I used about 1/3 of a cup of rice per pattern weight. Small dried beans or lentils, small pebbles are some other alternatives you may wish to try.

Step 7
Securely hand stitch your opening closed, to prevent any of the filling from escaping. You could machine-stitch this which may be more secure, however, the stitching line may be more visible.

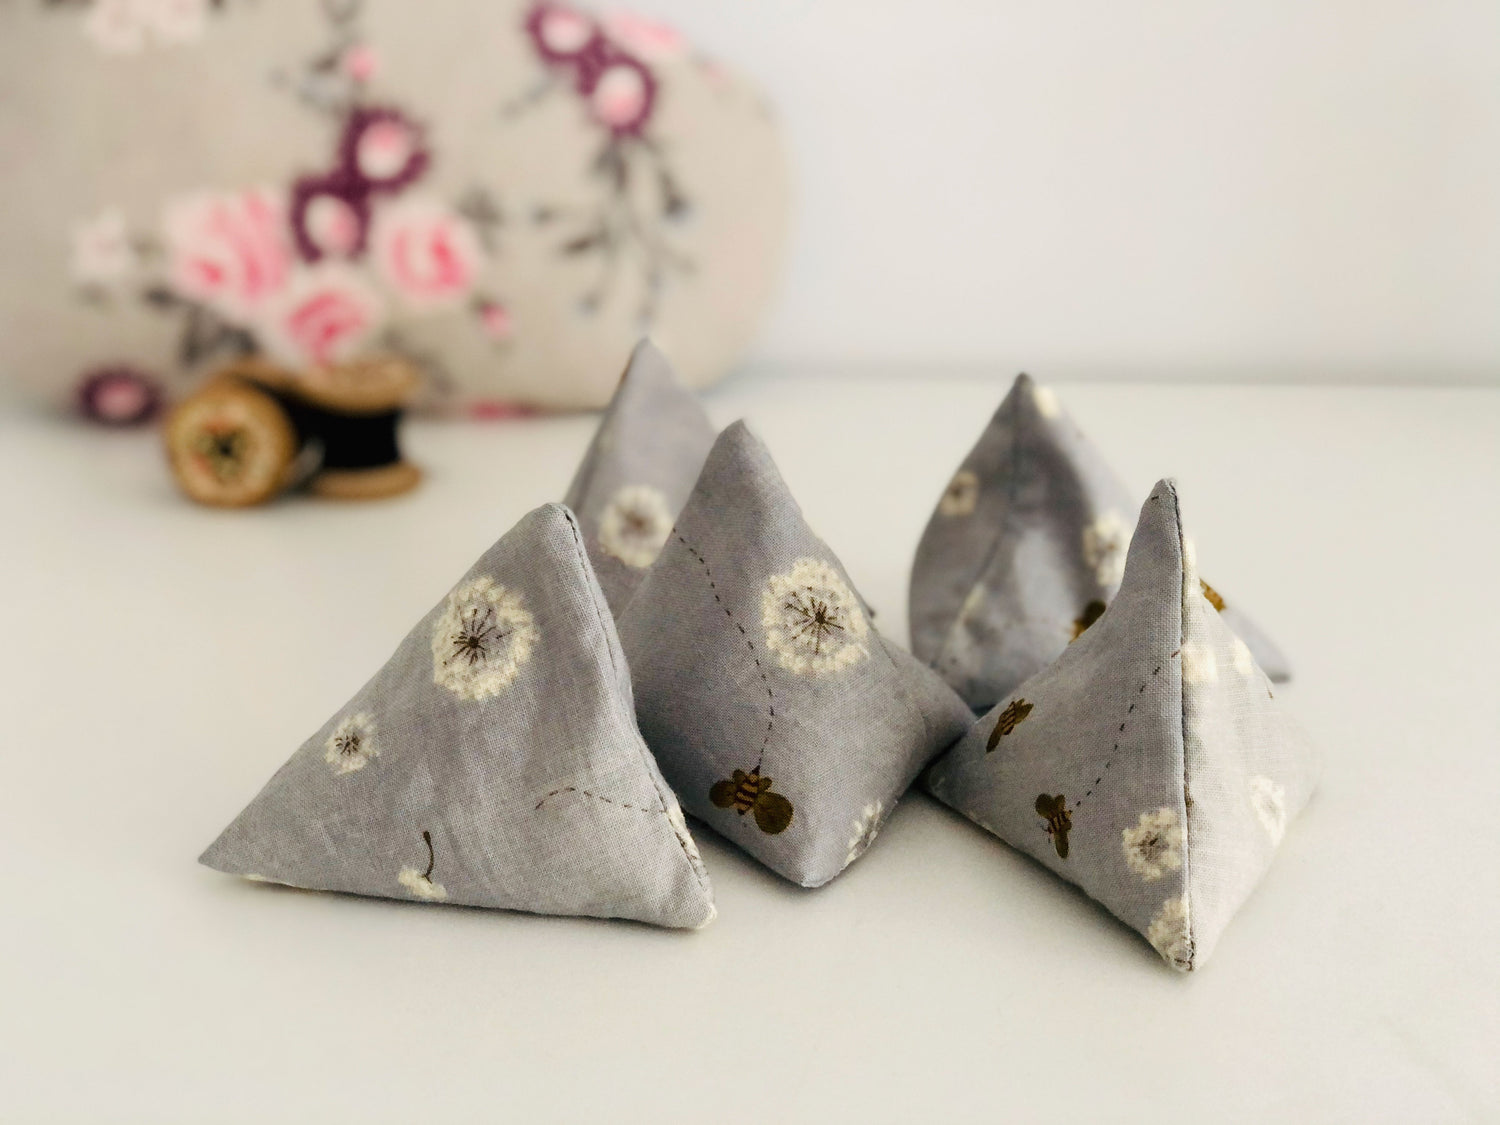
A beautiful pattern weight!

Tracey is passionate about sustainable sewing and creating a life for her family that is gentle on the planet. You can find her creations and a glimpse into her off-grid mini-farm on Instagram www.instagram.com/tracey_cleoscottage


