Shoulder Width Adjustment for a Raglan Sleeve - Grove

Use this simple pattern adjustment method to add some extra shoulder width to a raglan sleeve.

A good fit across the shoulders makes all the difference to the comfort of a garment.  If you find that tops tend to feel tight across the shoulders and upper back, or if you notice draglines pulling in from the raglan seam, then give this adjustment a try. 

Here, we demonstrate using the Grove Coat, but the adjustment can be used for any raglan top.

Materials

Gather some basic materials to adjust the pattern pieces:

  • Front/Back Exterior and Front/Back Lining pattern pieces
  • Measuring tape
  • Scrap paper
  • Ruler
  • Pen/pencil
  • Ruler

Measure

Begin by measuring your back to determine the size of shoulder adjustment to make.  

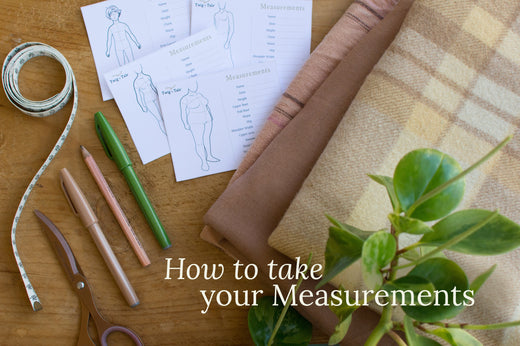
Measure across the top of your back from the crease where the top of your arm joins your back, from one side to the other.  This is easiest if you get someone to help you measure.

Board Shoulder Adjustment for Fable Dress by Twig + Tale

Work out the shoulder to shoulder difference between your body measurement and the size chart measurement.  The size chart shoulder measurement can be found in the pattern tutorial.

For example:

  • Your body shoulder measurement = 45cm
  • Size chart shoulder measurement = 40cm
  • Difference = 5cm

Since the pattern piece you will be working with is half the width of the back, divide the difference in half.  In our example, this would be 2.5cm.  This will be your pattern adjustment amount.  

Adjust pattern pieces

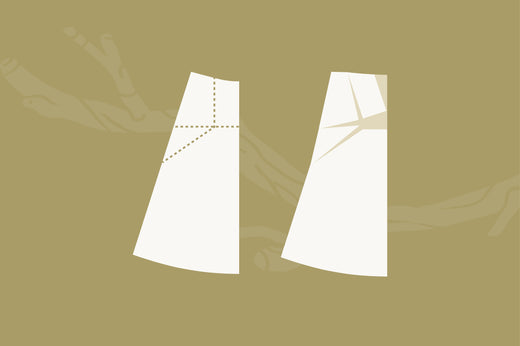
1. Mark two lines on Front Exterior and Back Exterior pattern pieces as follows:  

  • One line between dart and underarm, at a right angle to the grainline (horizontal dotted line in illustration below).  If you are making the men's (straight fit), or child version use the lengthen/shorten line as a reference rather than the dart.

  • One line from halfway between the neck and first notch on raglan seam, extending down to meet the first line at a 90 degree angle, parallel to grainline (vertical dotted line in illustration below).

Cut up to but not through the side seam allowance, leaving a bit of paper intact to create a pivot point. 

Wide Shoulder Adjustment for Coat by Twig + Tale

2. Pivot the corner section outwards by the amount determined above (your pattern adjustment amount).  Remember this amount is half the shoulder width difference: in our example above, half the difference is 1" (2.5cm). 
Pivot the front first.  When pivoting the back, ensure that the amount of overlap on the side seam is the same as on the front (so the side seams will still align when sewn).  If there is a difference, then break the pivot point and adjust the corner piece until it matches the front.


Wide Shoulder Adjustment fro Coat by Twig + Tale


3.  Blend the lines.


Wide Shoulder Adjustment fro Coat by Twig + Tale


4.  Repeat for the Front Lining and Back Lining pattern pieces.  Mark lines, and cut to create pivot points.  


Wide Shoulder Adjustment fro Coat by Twig + Tale


5.  Pivot the Front Lining and Back Lining pattern pieces, as described above.


Wide Shoulder Adjustment fro Coat by Twig + Tale


6.  Blend the lines.


Wide Shoulder Adjustment fro Coat by Twig + Tale


7.  Mark lines on the Front Sleeve and Back Sleeve pattern pieces, halfway between the top of the sleeve and the single notch marking.  Cut along the lines.

 
Wide Shoulder Adjustment fro Coat by Twig + Tale


8.  Slide the top sections of the sleeve up to add the same amount added to the front and back pieces (your pattern adjustment measurement, in our example = 1").  Tape in place.  


Wide Shoulder Adjustment fro Coat by Twig + Tale


9.  Blend the lines.


Wide Shoulder Adjustment fro Coat by Twig + Tale


10. Repeat for the Sleeve Lining pattern piece.


Wide Shoulder Adjustment fro Coat by Twig + Tale


Continue to cut and sew your garment as described in the pattern tutorial.  We always recommend sewing a muslin to test your pattern adjustment before cutting into your good fabric.


Please feel free to join us at the Twig + Tale Facebook group where you can ask questions, look for inspiration, and of course share photos of your creations.
Read more about the Grove Coat here: