Here are simple, step-by-step instructions for adjusting the arm circumference of a raglan sleeve with shoulder dart shaping. If you find that sleeves tend to be tight around the top, use this adjustment to add the perfect amount of ease to the upper arm, without impacting the fit of the garment elsewhere.
The method is demonstrated here using the Grove Coat, however it will work for any darted raglan sleeve.
![]()
Materials
- Pattern pieces (Sleeve, Top Front, and Top Back - you will also need to adjust the lining pieces in the same fashion)
- Measuring tape
- Paper for tracing pattern pieces
- Pencil
- Ruler
- Scissors
- Tape
Measure
For a comfortable fit, the Grove Coat needs a minimum of 3" (7cm) ease in the upper arm. If there is less than 3" (7cm) difference between your upper arm measurement, and the finished garment upper arm measurement (see the chart in the pattern tutorial), then you should do a pattern adjustment.
For a minor adjustment (less than 1.5"/4cm difference), then use the blend information in the tutorial. For an adjustment of more than 1.5 (4cm) the adjustment described in this tutorial will give a better result.
First, calculate the amount to add to the sleeve for a comfortable fit. In the Finished Garment Measurement chart, locate the upper arm measurement for the base size you have chosen. Subtract 3" (7cm) from that measurement. Compare this measurement with your body upper arm measurement.
In our example, we will use size M as a base size.
| Finished garment upper arm minus 3" (7cm) | 18 1/2" (47cm) |
| Sample upper arm measurement | 20" (51cm) |
| Difference = amount to add to pattern | 1 1/2" (4cm) |
In our example 1 1/2" (4cm) will be added to the sleeve pattern. We will divide this amount in half, because we will add ease in to both sides of the sleeve.
You will be adding to each side of the sleeve so divide this in half. So, we will add 3/4" (2cm) to each side of the pattern.
Adjust the Pattern
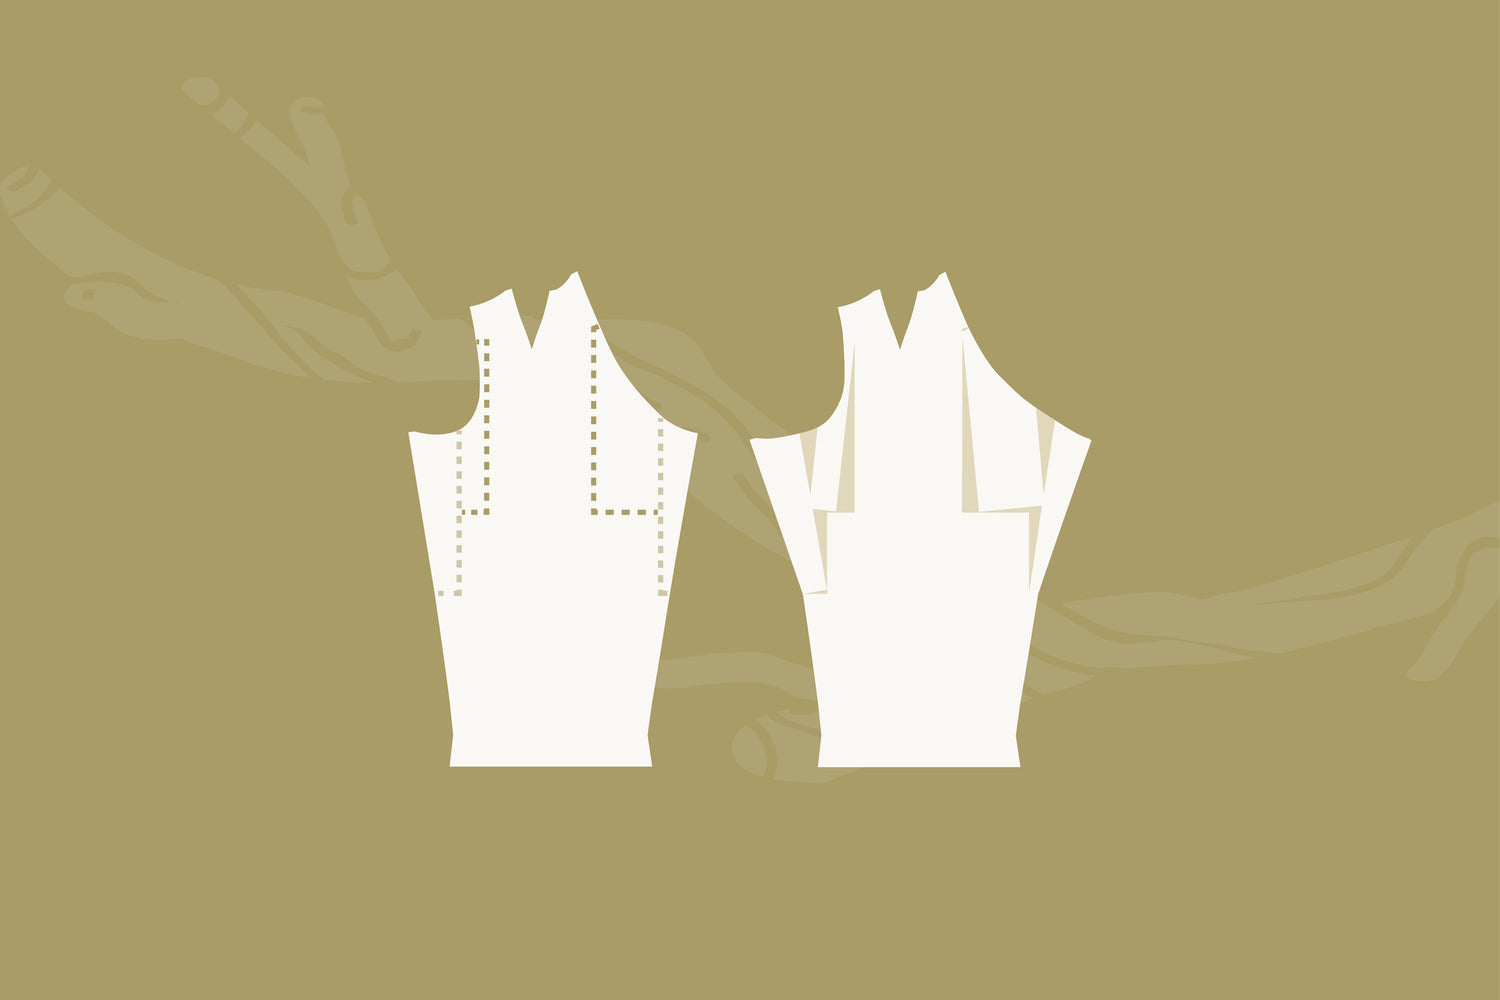
1. Draw a line on each side of the sleeve, parallel to the grainline, from the centre of the underarm curve (approximately) to the lengthen/shorten line.

2. On the Front and Back Sleeve, mark the seam allowance approximately 1/2" (1.3cm) below the top notches. From this point, draw another line parallel to the grainline, to about halfway down the line drawn in the previous step. Square this line across to the first line.

3. Cut along the marked lines, leaving a bit of paper intact at the side seams to create pivot points for pivot points (at the lengthen/shorten line and at the notch where the seam allowance is marked).

For the following steps, it is a good idea to position your pattern piece over a larger piece of paper, so that once the adjustments are made, you can cut around the entire finished piece. This prevents things from shifting around.
4. Pivot out the side sections until the gap at the raglan seam measures the amount calculated above. In our example it is 3/4" (2cm) on each side.

5. Pivot out the inner sections until the gap between the two sections looks fairly smooth (so they can be joined with minimal blending).

6. Blend/join the two sections and mark in the stitching line at this point.

Measure the distance between the two sections at the stitching line. In our example this measurement is 3/8" (1cm) on the front and 1/2" (1.3cm) on the back. If the measurements are different, simply pivot out the front side section until it measures the same as the back. This way your body adjustments will be the same and they will match on the side seams.

7. Using the Front Body and Back Body pattern pieces, mark the seam allowance just below the lower raglan notches.
On the Front pattern piece, draw a line from this point, parallel to the grainline, to just above the dart (if using the Women's/curved fit Front pattern piece) or to the lengthen/shorten line (if using the Men's/straight fit Front pattern piece).
If sewing the Women's/curved fit version, draw a line to the side seam just above the dart.
On the Back Body pattern piece, draw a line to the lengthen/shorten line (for both Women's/curved fit and Men's/straight fit pattern pieces).

8. Cut along the lines.

9. Slide the front and back sections down by the amount that measured on the stitching line of the raglan seams in step 6. Slide the sections out a little until the gap on the raglan seam looks smooth and can be blended easily.

10. Blend the side seams until smooth.

If you are making a lined garment, then you will also need to make these adjustments to the lining as well.
![]()
Read more pattern adjustment tutorials here:
- How to do an FBA (Fuller Bust Adjustment) for a raglan sleeve top
- How to do an SBA (Smaller Bust Adjustment) for a raglan sleeve top
- How to do a Shoulder Width Adjustment for a raglan sleeve