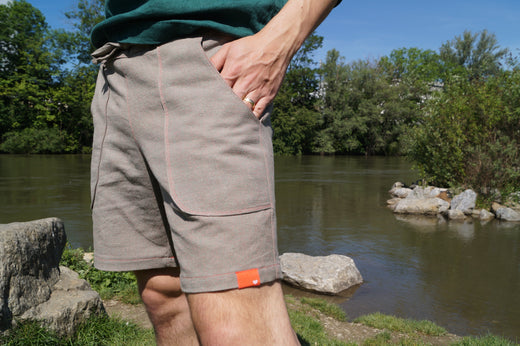
Here are step-by-step instructions for adjusting a top pattern to fit a fuller seat.
Use this adjustment to add extra ease just where it's needed - over the seat - without impacting the fit of the garment elsewhere.
This adjustment works well for the Scenic Top, Breeze Top, Driftwood Blouse, Vista Top, Ridgeway Top, Plains Dress, and Pixie Coat.
![]()
Materials
- Back pattern piece
- Large piece of paper to affix adjusted pattern pieces
- Ruler
- Pencil
- Scissors
- Tape
Measure
Choose your size based on your high bust or bust measurement, as described in the pattern tutorial. Use the Fuller Seat Adjustment if your hip measurement is larger than the hip measurement for the size you selected. This adjustment works best if the fuller part of your hip is mostly in your buttocks/lower back.
Work out the difference between your hip measurement and that of the size you have selected. For example, if the hip measurement for the size you have selected is 55" (140cm) and your hip measurement is 60" (153cm), then the difference is 5" (13cm).
Since the Back pattern piece is cut on the fold, we will divide the difference in half. So, our total adjustment amount will be 2 1/2" (6.5cm).
Adjust pattern pieces
1. Measure down from the underarm 8" (20cm) and mark the seam allowance of 3/8" (1cm). Note that this is a guide for an average adult height, so if you are taller or shorter than average, add or subtract an inch or two. This isn't a critical measurement; it simply provides a guide for blending in the final step.

2. Draw a line across the pattern from the mark on the side seam (made in the previous step) to the fold line. Draw a line parallel to the fold line from the first line to the hem. Draw a line on an angle from the top of this line to the lower curve of the armhole.
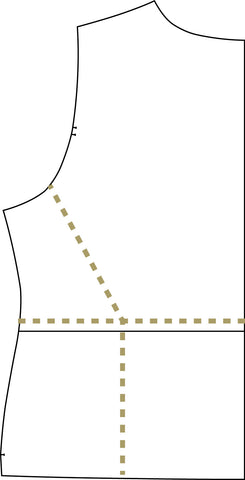
3. Mark the seam allowance 3/8" (1cm) on the side seam and armhole at the lines drawn in the previous step. Cut through all the lines, leaving a bit of paper at side seam and armhole intact to use as pivot points.

4. Lay the pattern pieces over a larger piece of paper. Carefully slide the lower side section away from the centre section, keeping the edges parallel. The upper side section will start to pivot and turn as it gets pulled sideways and the lower corners will overlap - this is correct. Slide the section over until the gap between the two pieces equals the pattern adjustment amount calculated above - 2 1/2" (6.5cm) in our example.
Each time you have finished moving a pattern section and verified the measurement, tape it in place to the paper below.

5. Carefully slide the lower middle section away from the top section keeping the edges parallel and the fold line straight. You may wish to extend the fold line before moving the pattern section so that there is a guide to keep everything straight. Move the section until the gap between the two pieces is half the pattern adjustment amount calculated above - 1 1/4" (3.2cm) in our example.
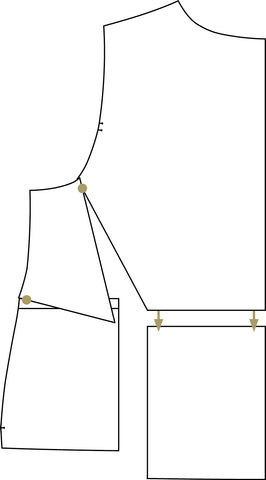
5. Gently blend the hem, side seam and armhole.

Use your newly-adjusted pattern piece to cut and sew the top as described in the pattern tutorial.
We recommend sewing a muslin to test the pattern adjustment before cutting into your good fabric.
![]()
Read more pattern adjustment tutorials here: