This pattern adjustment can greatly improve the fit of a garment for those whose shoulders tend to round or slope forward. This is an adjustment that may also be helpful post-mastectomy.
Here, we explain the adjustment on the Womens/Curved Fit Grove Coat, which has raglan sleeves that feature a shoulder dart. However, it can also be used for Driftwood, or any garment with a raglan sleeve.
How do I know if I need a Forward Shoulder Adjustment?
A Forward Shoulder Adjustment may be needed if your shoulders tend to angle or round forward towards the front of your body.
When examining the fit of a garment, this may appear as:
- excess fabric in the front armhole, which may cause wrinkling or pooling.
- garment may be tight across the back.
- shoulder seams may not be centred over the shoulder, and have a tendency to slip back.
We recommend sewing a muslin (toile) of your garment first, to determine the size of adjustment to make. For this pattern adjustment, we will be angling the shoulder forward, removing unintended volume from the front of the armhole, and adding it to the back.
Try on your muslin and pinch out and pin the excess fabric from the front armhole - this will be your adjustment amount. At the same time, check if the pinched adjustment has moved the shoulder dart forward. The dart's seam should be pointing from the middle of your neck (side on) to the outer shoulder point and down the arm.

The back armhole will feel very tight after this pinning but try to ignore this for now as you will add more fabric back into this area to release that tension once the adjustment is finished.
If the dart is not sitting well on your body, you may have to do a small forward head/neck adjustment by pinning some fabric out of the front neck.
Measure the quantity of fabric you pinned out at the armhole seam (and at the front neck if it was required).
Materials
- Ruler
- Pencil
- Scissors
- Scrap paper
- Pattern pieces (Front and Back pattern pieces, Sleeve pattern piece)
Adjust the pattern pieces
In this example we are adjusting both the neck and front armhole seam to move the dart into the correct place along the shoulder.
1. Draw a line across the raglan seams on both the Front and Back, from around halfway along the neckline to the middle notches in the armholes. Cut through the lines.

2. Move the cut top sections by the amount you pinned out at the armhole seam, and at the neck area.
In this example, 3/8" (1cm) was pinned out of the Front neck and 5/8" (1.5cm) out of the Front armhole seam, below the shoulder.
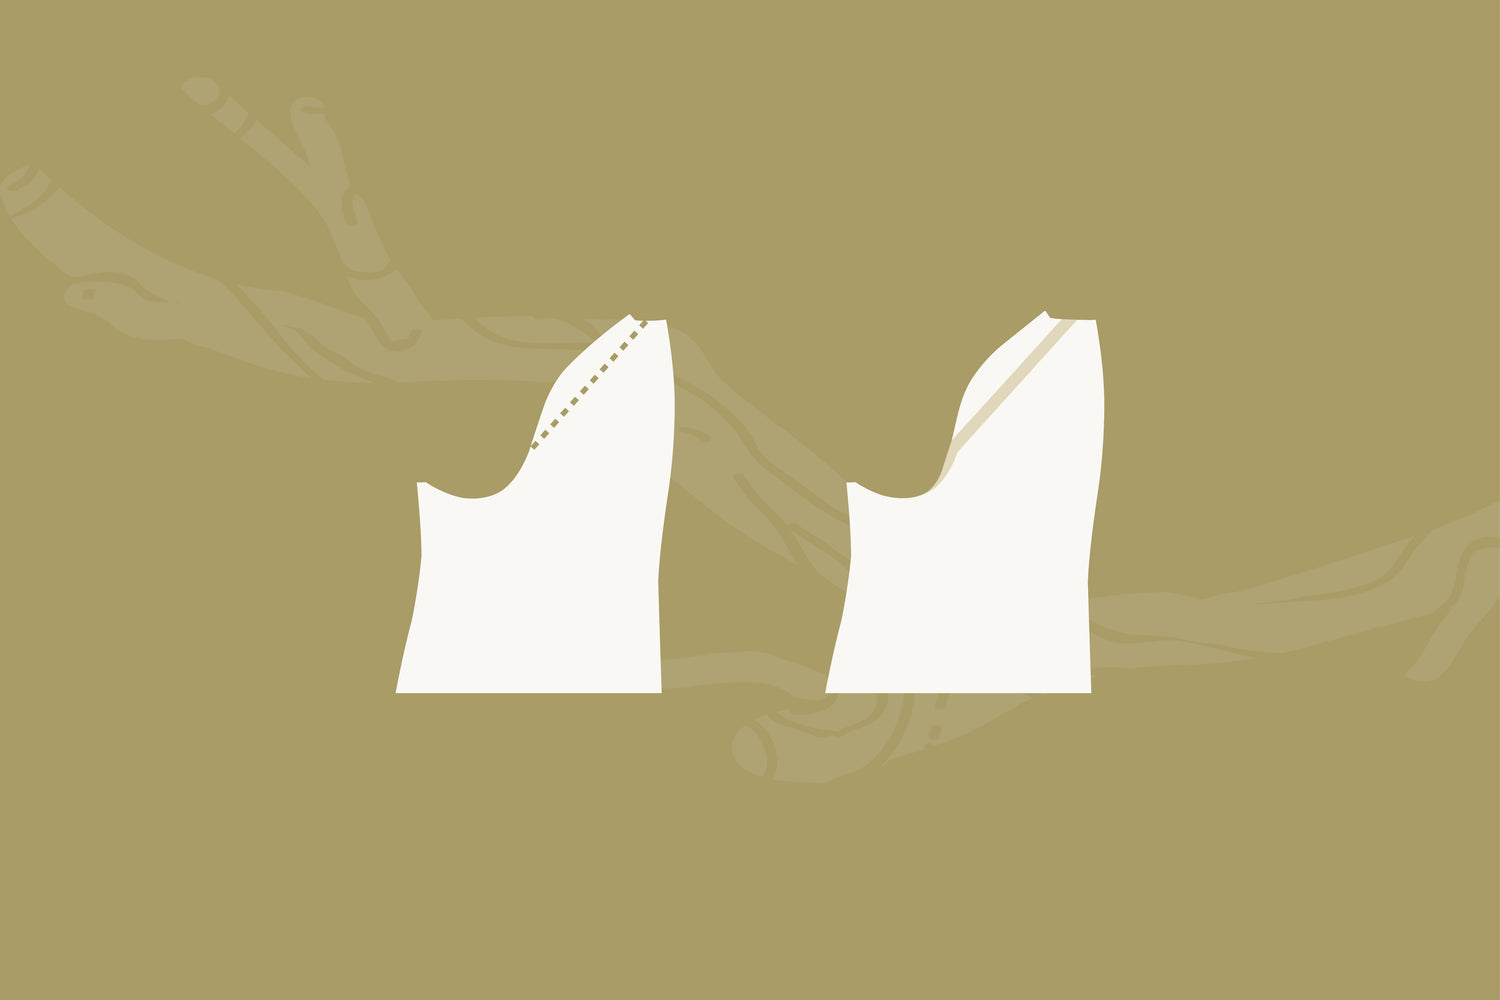
Starting with the Front pattern piece, move the top section down the two adjustment amounts that you pinched out - armhole at armhole, neckline at neckline. The sliced off section will overlap the rest of the Front at an angle. Tape into place.

Turning your attention to the Back, place a piece of paper beneath the cut area. You will then move the top slice up and away from the rest of the pattern piece. This time adding the two adjustment amounts at the armhole and neckline, instead of subtracting. Tape the pieces down to the prepared paper you put underneath, to secure them in place.
This will remove fabric from the front and add the same amount to the back
You will move the top section on the Front to overlap the Front and you will move the top section of the Back away from the Back. This will remove fabric from the front and add the same amount to the back

3. True up your seam lines between the top sections and the body at the neck and armhole.

4. Moving these pattern pieces around will mean that the raglan seams will have changed in length, especially between the two armhole seam notches. Using the patterns previous notch positioning as a guide, mark your new notches.
Then measure between the stitching line between the notches and make a note of the new length. This will need to be adjusted on the sleeve in a later step.

5. Taking your Sleeve piece, mark points along the Front side seam the width of your armhole adjustment in from the edge. Use these points to draw a line parallel along the entire length of the seam. In this example this was 5/8" (1.5cm).
Cleanly cut along this line.

6. Flip this sliced strip over, and tape it to the opposite side of the sleeve. This rotates your sleeve forward, in line with the adjustment you made to the Front and Back pattern pieces.

7. Using the measurements between the sleeve notches that you noted earlier on the Front and Back bodies, adjust the sleeve notches to match.

8. In this example, because the neck was also adjusted, the notches on the hood will need to be moved by the same amount. In this example it was 3/8" (1cm) toward the front neck.

9. Repeat all the steps for the lining and facings.
You can now use your newly-adjusted pieces to cut and sew your garment!
![]()
Read more about common pattern adjustments here:
- Fuller Bust Adjustment (FBA) for a Raglan Sleeve - Grove, Driftwood
- Smaller Bust Adjustment (SBA) for a Raglan Sleeve - Grove, Driftwood
- Fuller Upper Arm Adjustment for Raglan Sleeve with a Shoulder Dart - Grove
- Shoulder Width Adjustment for a Raglan Sleeve - Grove


