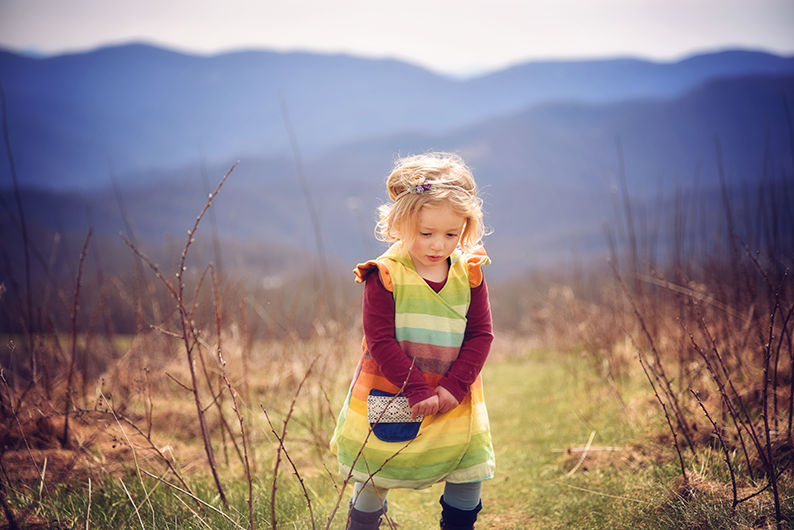
We're so pleased to feature our first co-authored Storyteller article this month, and it's a special one that reads like a conversation between friends. Sashanna Hart and Wietske Ossendorf may live on opposite sides of an ocean, but through the Twig + Tale community, they've built a friendship that goes far beyond sewing to family, faith, health, and other shared experiences.
Their project for this month's blog post began with a single inspiration image. Each took her own path, with Sashanna and Wietske both hacking the Windward Dress into a laced-front layering dress. Along the way, they reflect on the layers that make up an idea, a sewing project, a garment, and a friendship.

Wietske: Everything good in life is layered: sandwiches, burgers, a buttery croissant, or best of all, lasagna. (I do enjoy eating lasagna very much.) In the same way, our lives are layered with people who make it tasty, spiced, and warm. Some people you wear close to your heart; they touch your life daily. And other people you only meet now and then, helping you grow or gain wisdom. Some might be a bit scratchy, like a scarf made out of coarse wool. But you are happy you have them when winter comes and the temperature drops under zero.
The same is true with sewing. You can, of course, sew alone and have a rather splendid time at it. But it gets so much richer if it's layered with the thought and inspiration and ideas of good sewing friends. That's what is so wonderful about the Treehouse and the Storytellers. It’s just lovely to have all these layers of wisdom and creative minds surrounding your own sewing process.
Via the Storytellers, Sashanna and I got to know each other. Sashanna started out like a fun hair accessory to me (still staying in the clothes analogy.) (Sashanna does wear beautiful flowers in her hair.) But she moved closer to my heart every time we talked.
We share our thoughts on anything: health, work, faith, and kids. Every time I listen to Sashanna talk about what matters to her, I feel richer. So, we thought it would be fabulous to sew a project together, inspiring each other on the way! And oh, did it not disappoint! Here is our journey together; we hope it can inspire you as well.
Sashanna: Wietske is someone whose work I frequently feel inspired by. I remember her adorable coot screen printed Meadow skirt at the beginning of our Storyteller journey back in 2023. I also recall that during that Storyteller season, Wietske did some incredible hacks of Twig and Tale garments to recreate a traditional costume from her native Holland.

These projects must have been in the back of my mind when, at the beginning of this Storyteller season, I saw an ad for an RTW clothing company that was promoting a medieval looking ensemble with a kirtle and lace-up overdress combination. I immediately thought of Wietske, of her hacking bravery, of her love of traditional clothing, and of how wonderful it would be to make something together. So I screen-shot the ad, and sent it off to her with a message that went something like, “Ok, what if we make this outfit. And what if we hack some Twig and Tale patterns to make it. And what if we do it together, so we are making the same thing but in our own way and across the ocean from each other. And what if we write a blog post together about it under the theme of layers. What do you think?” Blessedly, she said yes!
As Wietske has pointed out, there is a beauty to the layers of life that increase its richness. Of course a chocolate sheet cake can be nice, but a seven layer carrot cake has the possibility of so much more nuance. Our lives are made up of many layers, and it can be beautiful to see how the layers get woven together. German historian Reinhart Koselleck has a theory about life that says that our lives are made up of many layers of time. Our use of computers, of the internet, of social media is a very young layer of our lives. However, if we participate in an ancient religion, then there is a layer of our lives that may be 2000 years old. And as people who sew, there is a layer of our lives that goes back to the very dawn of human history. So, while Wietske and I live an ocean apart, and have never met in person, she is part of many layers of my life. We share the layers of sewing, of faith, of raising children, of being uprooted in certain ways, and of health challenges. Our relationship exists through the very modern life layer of the internet and social media, but we share many ancient layers that tie us deeply together and root our friendship in good soil where there are so many ways in which it can grow.

Wietske: Okay, I am tearing up now... (gets handkerchief to dry eyes)
Sashanna and I got all creative, thinking about how to change the Fable dress to meet our expectations, realising this was going to be a rather hard nut to crack. Then the Twig + Tale team surprised us with the most perfect solution to our problem: they created the Windward Dress.
There still was some cracking of nuts to be done. But not as extensive as with Fable. Our original vision had lacing on the front, rather than on the sides. And it was completely slim fitted. Sashanna might have praised my ability to hack patterns, but it definitely was Sashanna who did the most intriguing hacking known on the planet, whilst I took the road of least resistance. We want to give you a short impression of us hacking about. And we invite you to joyfully hack alongside us.
Sashanna: So, what I should have done, but didn’t do, is check the amount of ease built into the waist of the Windward dress as a starting point. I suggest that you do this in your own size to determine how much ease has to be removed from the side panels of the dress bodice, as this is where the ease is concentrated. I used the slash-and-overlap method to remove the ease, basically the opposite of the slash-and-spread. I wear size G, which has 10 inches of ease in the waist. I removed the excess in stages, redrawing the armhole each time, as overlapping the bottom of the pattern piece causes the armhole to distort. You can see this in the image below.

If you do this yourself, be aware that the Windward pattern states that the ease varies between 8 and 11 inches depending on what size you fall into. Just compare the finished measurement of the waist with your own waist measurement to determine how much you want to remove. I also removed ⅜” from the front center of the front bodice piece to be sure there would be an opening between the two panels when I laced it up.
During the course of our hacking adventures, Wietske sent me a photo of a dirndl, and I noticed the nice metal d-rings used in the front lacing. Because there is a lot of friction between fabric rouleau loops and fabric lacing, it seemed to me that the metal d-rings would be a better option for a garment that will need to be adjusted a good deal. I looked at pre-made corset ribbons that had d-rings already attached, but ultimately decided to make my own, as the pre-made ones looked poorly constructed. I used ⅜” twill tape, and ⅜” d-rings to make a strip of evenly spaced d-rings down the front of the bodice. You can see the construction below. I am very happy with this choice, as it made the over-dress much easier to pull on and off.

After reducing the side panels of the bodice by a total of 10" (5" per panel), which is nearly half the original width, it was far too small to accommodate two skirt side panels. I chose to remove one skirt panel. However, I still wanted pockets, so I decided to use the pattern pieces for the Lorien skirt to add pockets to the center of the side panel. If I made it again I would probably just use normal inseam pockets and put them at the front seam. The pockets work as they are, but they are set a little too far back to be comfortable for just putting your hands into for warmth. The one challenge when attaching the skirt to the bodice was that the pleats could not be made as deep as in the original pattern because of the removal of one panel. I made the pleats half as deep and that worked just perfectly.
Wietske: As already told, my hacking is in no way as impressive as Sashanna's master skills. What I did: I reduced the dress in the waist by 2 sizes. Then I used the loops that are on the backside to create lacing at the back.

And that works really well. The loops that are more on the front side are omitted. Then I cut 8 cm/3⅛” out of the front of the dress and added my loops there. (You do need more loops to make this work, I added 2 extra loops on both sides, making sure to space them evenly.)

Now you can just go and cut your front skirt pattern piece in half exactly in the middle. This will become the front hem line. If you press it 1 cm/ ⅜”, and then 4 cm/1 ½ “, you have a lovely wide hem that looks very nice.

Sewing does change a bit. But you can sew the body, just as you would normally. The wonderful sandwich method also works splendidly. When you close the neckline, you just sew on and also close the front opening of the dress, with rouleau loops (or Sashanna's cool d-ring loops) placed between lining and main fabric.
Before you add the skirt to the top, you should completely finish the skirt. A tricky part with this hack is the point where the front hem meets the bottom hem. You want that to overlap nice and crisp. To achieve that, you should turn the (not yet sewed) front hem the wrong way around (so good sides of fabric lie on top of each other. Please only turn the 4 cm around. The 1 cm/⅜ “ fold should remain as it is.)

Next, grab your extremely long facing of the bottom hem and prepare it as in the instructions. Cut the middle front part in 2 pieces, and sew the whole affair in place, making sure it extends onto the folded front hem for about 1 to 2 cm/ ⅜ to ¾ ”. Then cut it off, but sew the hemline until the end. (Sew over the front hem turned wrong side out.)

Now you can turn everything normally (for a very crisp corner, take your iron, and iron the bottom hem upwards, onto the fabric). Grab that nice clean corner and squeeze it mightily between your fingers, (one finger outside, one finger inside the fabric) and now turn the rest right side out. Keep that nice folded edge squeezed whilst turning. You should end up with the crispest corner you have ever seen.

Now topstitch the front hem all the way down. The facing of the bottom hem is also attached, but make sure to start that hem exactly on the hemline of the front.

Now you can add your skirt onto the top. Make sure the front hem of the skirt aligns exactly with the top.
Well that’s all for the hacking. If anything remains unclear, you are very welcome to ask Sashanna and me your questions in the Treehouse. Or just ask them to the broad Treehouse community, it’s full of extremely wise and super friendly people, ready to help with all your sewing problems.
Now back to layering. For now we have this absolutely delicious dress that is made for layering cool pieces underneath. I chose to combine it with a Driftwood dress with a longer skirt. Sashanna, what did you do?
Sashanna: The inspiration photo certainly is most reminiscent of the Driftwood dress, but somewhere between the conception of the idea and the realization of it our family watched a Time Team episode (we are very nerdy, old school Time Team fans) where a woman was wearing a Medieval kirtle. I loved the silhouette so much and I wanted to recreate it. I thought that the Breeze shirt would be the right shape in the bodice and neckline and decided to try extending the skirt to be maxi length. To do this I simply cut out the pattern in my size and determined how long I wanted the dress to be using another simple a-line maxi that I have. I taped the bodice piece to 18” wide freezer paper cut to the final length. Then, using a long ruler, I extended the angled line that starts at the waist from the fullest point at the hip down to the same length as the front length, which is cut on the fold. I then connected the two points with a slightly curving line, to make a simple a-line dress. If I was to do it again I would probably try to figure out how to add more fullness in the skirt. I don’t think you can slash and spread when the skirt is part of the bodice, but perhaps some gores are in order. Otherwise I made the rest of the dress according to the Breeze pattern instructions. I did not add elastic to the back. If I wear it without the overdress then I just wear it belted.

Wietske: I love your Breeze dress so much! And I also love how your Windward Dress hack turned out. It is actually the most accommodating dress I ever met. Sashanna's Windward can be paired with literally anything. Even the most unloved items in her wardrobe suddenly transformed into real fancy looks.

I tried some different options of layering as well. And as I live on a cold misty mountain in Germany, at least half the year is spent wearing thick layers of wool. So, that was the goal. I actually put a thick woollen sweater underneath and lo and behold... due to the lacing, it works effortlessly! This is such a gamechanger! I always struggle to look dazzling covered in wool, but now there is hope!

Sashanna: Wietske failed to mention two extra special layers in her Windward corset dress. It used to be fuchsia, for one thing, and she overdyed it with black (so brave) to get the glorious burgundy color it has now. Also, while my fabric already had embroidery on it, Wietske added the beautiful layer of hand embroidery to the front of hers. I think Wietske oversells my capabilities, as her knack for turning anything simple into something beautiful with a needle and some colored thread is a talent that I truly admire.

For me this project has completely altered the way I view patterns, particularly Twig and Tale patterns, since they are so well written. A pattern itself can be a layered object, containing within itself many strata of creative possibilities just waiting to be discovered. It has also made me realize that, with a good friend behind me, I am much braver when it comes to digging for the next layer of innovation. This year has been the first that I have been bold enough to alter a pattern in a dramatic way, and I am certain that it would not have happened if Wietske hadn’t said yes to my wild proposal at the beginning of the Storyteller year. Our adventure has changed me as a sewist. It has also deepened our relationship, as a shared project inevitably led to a plenitude of delightful WhatsApp voice notes that meandered unhurriedly from sewing, to healing, to raising teenagers, to living far from our birth families, to prayer and back, building up ever more enduring ties that we will treasure and nurture as we age, and watch our children grow and continue to face new challenges.
Wietske: So, this has been so much fun. Sewing together is just 10 times better than sewing alone. And we are already brewing up some breezy new ideas…
Sashanna: As Piglet says, “It’s more friendly with two.”