One of the most satisfying things about sewing your own clothing is being able to customise the pattern to suit your body. Length changes are one of the most common adjustments needed.
Many pattern pieces are basically rectangles and so are easy to adjust - simply measure up or down from the hem edge (or use the lengthen/shorten lines) and your adjustment is done - time to sew! But flared pieces can be a little more tricky, especially if you need to lengthen or shorten by quite a lot and you worry that you will lose some of the shape in your final garment.
Here's a simple method that will allow you to adjust the length of garments, while retaining the beautiful shape of the curved hem. This adjustment works well for garments like the Lorien Lace-up Skirt, the Overland Cloak, the Traveller Cape, or the Flourish Dress Coat.
Materials
Gather some basic materials to adjust the pattern pieces:-
Back & Front pattern pieces
- scrap paper
- tape
- pen/pencil
- Optional: French curve or flexible ruler
Method
First, work out how much you would like to lengthen or shorten the pattern. Decide where you would like the hem to sit on your body, then go to the finished garment measurements chart in the pattern tutorial and compare the measurement with your preferred length. Work out the difference between the two measurements: that's how much to add or remove from the pattern pieces.
In our example we will be adding length to the pattern pieces. If removing length, reverse the steps so that the amount is removed from the pattern pieces, rather than extending the lines from the pattern pieces.
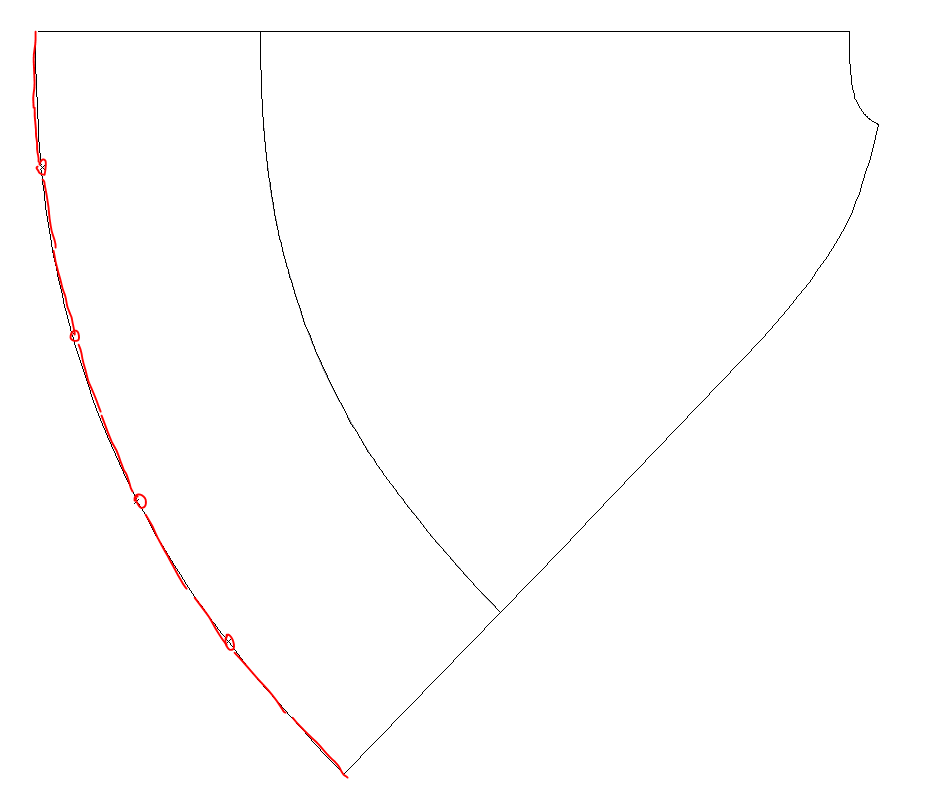
1. To lengthen, tape extra paper behind the hem of your pattern piece to draw on the extension. Using a ruler, extend the lines by the measurement you wish to add. (Note, cloak pattern piece pictured on left, skirt pattern piece pictured on the right).

2. At this point, pause and check that the adjusted pattern piece will still fit across your fabric. If it doesn't fit, you may need to add a centre seam or turn the pieces to run along the cross grain.

3. At regular points along the hem, measure down by the same amount as you added along the lines in step 1 and create marks.

4. Blend between the points to create your new hem. Repeat for ALL other pieces including linings and front facings (if needed)

5. If your pattern has a shaped hem facing, or you would to add one, trace around your new hem on piece of paper and measure up from the new hem by the width you would like the facing to be. Complete instructions for creating a wide, curved hem facing can be found here.


Please feel free to join us at the Twig + Tale Facebook group where you can ask questions, look for inspiration, and of course share photos of your creations.
![]()
Read more about trouser, skirt and dress pattern adjustments here:
- How to Add Volume to a Gathered Skirt
- Fuller Seat (Shelf) Adjustment for Pants, Skirts and Dresses
- Fuller Abdomen Adjustment for Trousers - Shore, Coastal, Cove