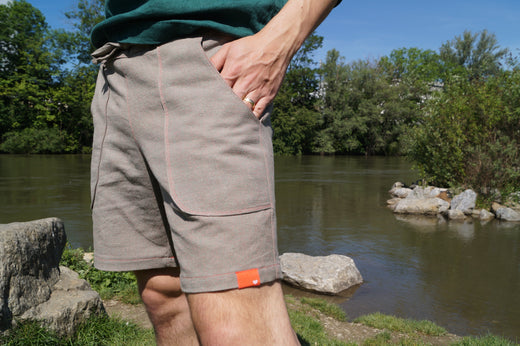
This pattern adjustment can greatly improve the fit of a garment for those whose shoulders tend to round or slope forward. This is an adjustment that may also be helpful post-mastectomy.
Here, we explain the adjustment on the Fable Dress, which has set-in sleeves and a princess-seam bodice. However, it can also be used for other garments with a set-in sleeve, such as the Breeze Shirt, Scenic Top, Vista Top, Pixie Coat, Plains Dress, Flourish Dress Coat, Bloom Jacket, and Forester Coat.
How do I know if I need a Forward Shoulder Adjustment?
A Forward Shoulder Adjustment may be needed if your shoulders tend to angle or round forward towards the front of your body.
When examining the fit of a garment, this may appear as:
- excess fabric in the front armhole, which may cause wrinkling or pooling.
- garment may be tight across the back.
- shoulder seams may not be centred on the shoulder, and have a tendency to slip back.
We recommend sewing a muslin of your garment first, to determine the size of adjustment to make. For this pattern adjustment, we will be angling the shoulder forward, removing excess volume from the front of the armhole, and adding it to the back.
Try on your muslin and pinch out the excess fabric from the front armhole - this will be your adjustment amount.
Materials
- Ruler
- Pencil
- Scissors
- Scrap paper
- Pattern pieces (Front and Back bodice/top pattern pieces, Sleeve pattern piece)
Adjust the pattern pieces
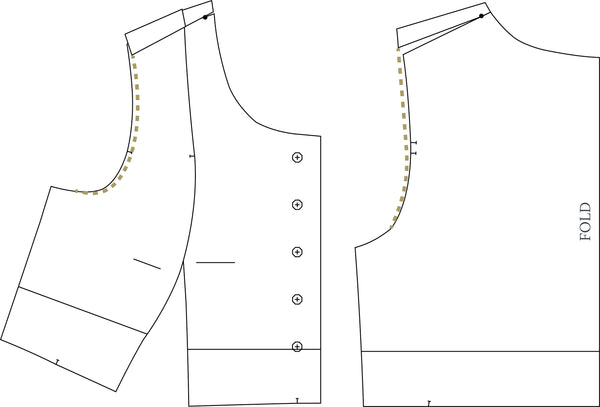
1. Using the Front Bodice pattern piece, mark a line 7/8" (2cm) from the outer edge (double the seam allowance).

2. Position the Side Front Bodice pattern piece along the line drawn in the previous step, lining up the shoulder. Tape in place.

3. On both Front and Back pattern pieces, mark the 3/8" (1cm) seam allowance across the shoulder and along the upper curve of the neckline. Mark a pivot point where the lines intersect at the shoulder-neck point.

4. On both Front and Back pattern pieces, make a mark 1" (2.5cm) down the armhole, and draw a line to connect it to the pivot point. This will create an angled line across the shoulder.
Cut the line on either side of the pivot point, but leave a bit of paper at the pivot point intact, if possible.

5. Use your muslin to determine how much extra fullness to remove from the front armhole.
From the pivot point, swing the Front pattern piece out so that the pieces overlap by the amount of fullness you need to remove. Tape in place.
Repeat for the Back, but swing the pattern piece in so that you add the same amount into the back armhole. Tape in place.

6. Using the outer corner of the shoulder as a guide, redraw the Front armhole, removing no more than 1/4" (6mm) from the armhole. This will reduce the amount of excess fabric across the front bodice.
Repeat for the Back, but this time add a small amount of width to the back armhole. This will help to address tightness across the back.
7. Using the same measurement you used to alter the bodice pieces, draw a line down the front side of the Sleeve underarm. Cut along this line.

8. Move the strip you cut off in the previous step from the front of the sleeve and tape it to the back edge. It may be necessary to clip the section at the hem notch so that it can follow the line of the back side edge.

9. Re-mark the notches by moving them by the same amount you pivoted the front and back bodices. The Front notch will move up toward the top of the sleevehead. The Back notch will move down toward underarm seam. This reflects the length taken out of the front upper armhole, and added to the back upper armhole.

10. Now, separate the Front and Side Front pattern pieces by carefully snipping along the cut edge of the Side Front. Make sure the overlapped edge is well taped in place on both pieces so they don’t shift as you separate the layers.
Use your newly-adjusted pieces to cut and sew your garment!
![]()
Read more about common pattern adjustments here: